Every stitch tells a story · Free PDF Pattern with Weekly Newsletter Claim Free Guide →

Every stitch tells a story · Free PDF Pattern with Weekly Newsletter Claim Free Guide →
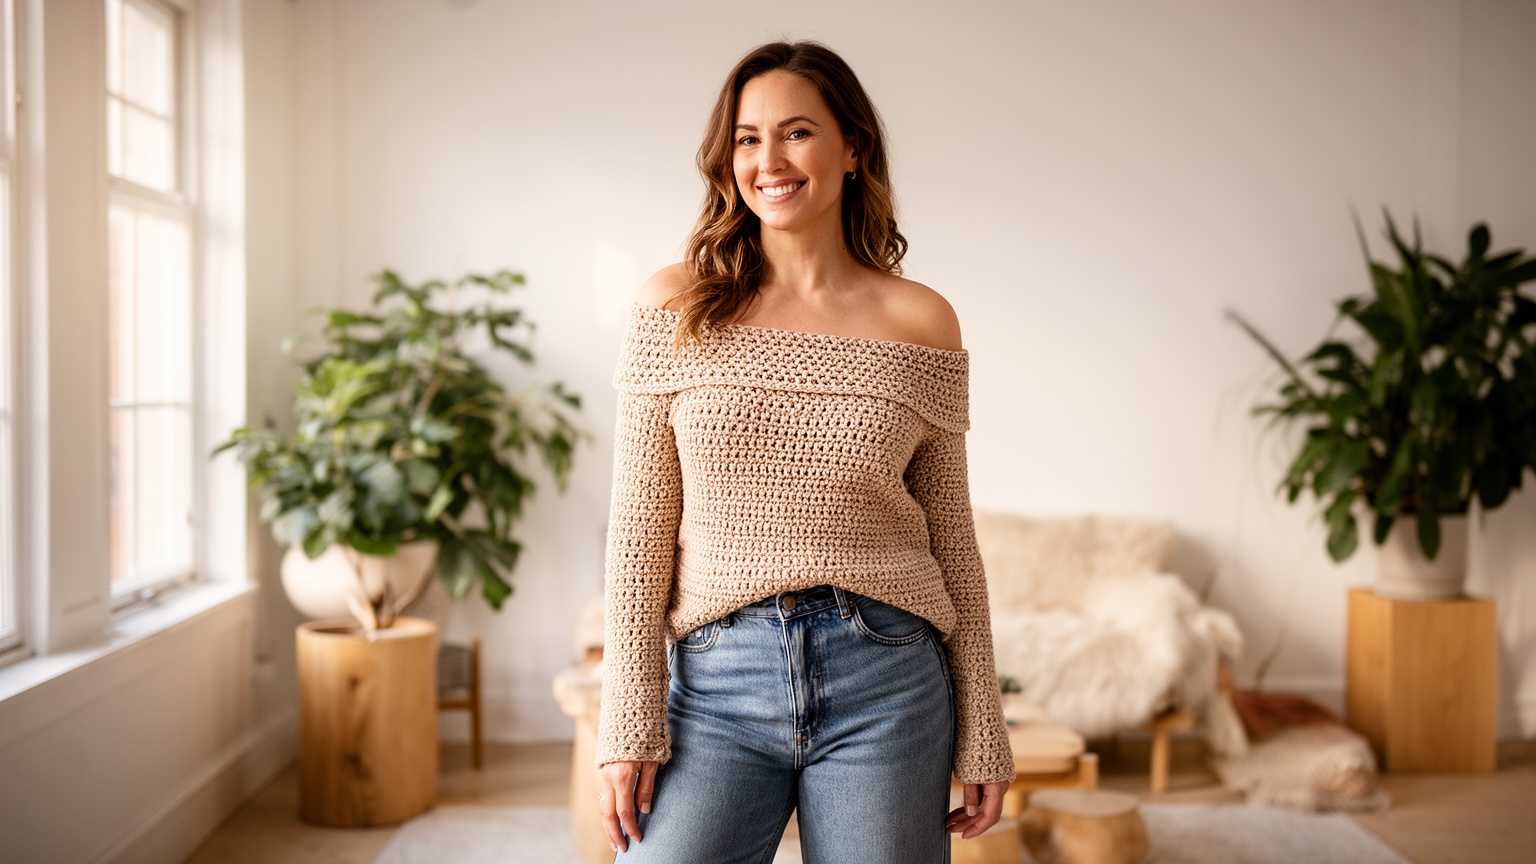
Crochet Off The Shoulder Sweater: 11 Proven Ways To Build A Neckline That Grips
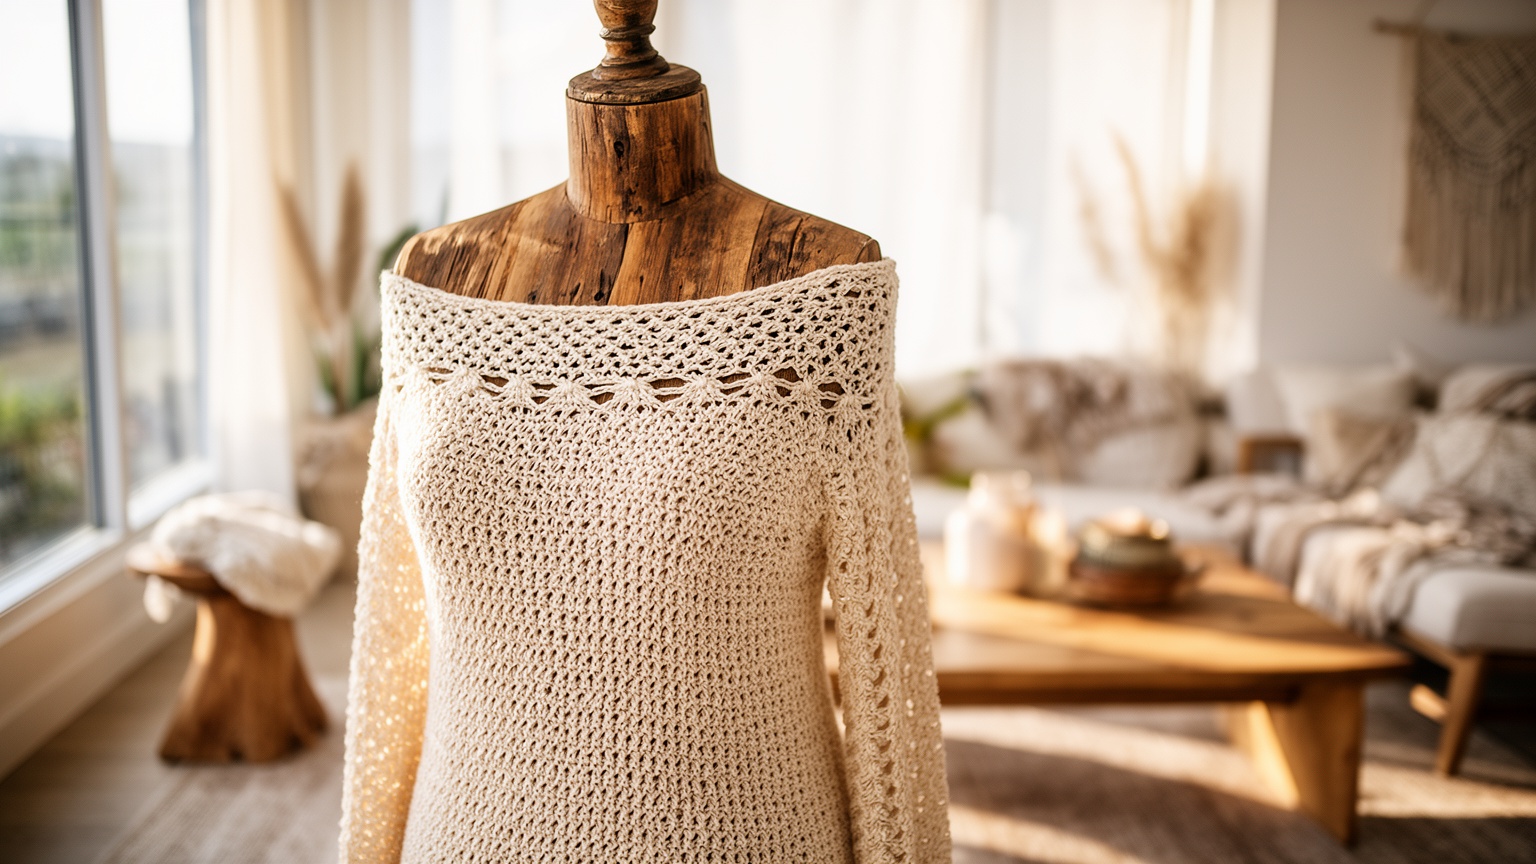
A crochet off the shoulder sweater demands more than basic rectangular panels and a loose neckline. The defining challenge is engineering a shoulder band that stays below your shoulders without sliding down your arms every ten minutes. Most patterns gloss over the physics of keeping fabric in place against gravity, leaving you with a beautiful garment that you can’t actually wear. This guide eliminates that frustration by teaching measurement based construction rather than rigid sizing.
Table of Contents
- Why Crochet Off the Shoulder Sweaters Are Different (And Why That Neckline Won’t Stay Put)
- What You’ll Need: Materials, Tools, and the Real Costs
- The Five Body Measurements You Must Take (That Regular Sweater Patterns Skip)
- Gauge 101: Why Your Row Count Matters More Than You Think
- Building the Ribbed Shoulder Band That Actually Grips
- Constructing the Front and Back Panels (Made to Measure Method)
- Sleeve Construction and the Armhole Attachment Challenge
- Assembly Without Tears: Seaming, Alignment, and Try On Checkpoints
- The Three Fixes for a Neckline That Keeps Falling Down
- Blocking, Finishing, and Care (Without Destroying the Fit)
- Your First Off the Shoulder Sweater: Realistic Time and Skill Expectations
- Frequently Asked Questions
Key Takeaways
- Crochet Off the shoulder sweaters require a grippy neckline band engineered with negative ease and elastic stitches to prevent slippage.
- You need five specialized body measurements beyond the standard bust circumference to achieve a secure, custom fit.
- Most beginners fail because they skip gauge swatching and proper row counting, leading to sleeves that don’t align with armholes.
Why Crochet Off the Shoulder Sweaters Are Different (And Why That Neckline Won’t Stay Put)
Crochet off the shoulder sweaters require a neckline band engineered to grip the shoulders using negative ease and elastic stitches, not just sit loosely. Most beginners treat the neckline like a regular crew neck and don’t account for shoulder circumference, stretch recovery, or gravity.
A user working on an off the shoulder crochet design reported that the garment fit the torso but felt too loose around the chest and risked slipping after completion. This is the #1 complaint: the sweater looks perfect on the hanger but slides down within minutes of wearing it.
Regular sweaters use a fixed crew, V neck, boat, or turtleneck opening connected to shoulder seams. An Crochet off the shoulder sweater instead requires a wide opening supported by a ribbed or textured shoulder band, elastic or drawstring support, positive ease combined with stretch recovery, and a circular yoke or band worked around the upper torso.
The main body may use simple double crochet or another repeating stitch, but the neckline often needs a denser, more elastic stitch structure. Front post and back post double crochet create vertical ribbing that can contract around the shoulders. Regular sweaters can rely more heavily on flat panels or uncomplicated rectangles. Crochet off the shoulder sweater designs need stitch patterns that manage horizontal stretch around the neckline, vertical support against gravity, recovery after the garment is worn, seam stability at the shoulders, and a clean transition between band and body.
What You’ll Need: Materials, Tools, and the Real Costs
A beginner friendly adult Crochet off the shoulder sweater published in October 2024 requires approximately 1,000 yards of worsted weight yarn and a size 4 (3.5 mm) hook, with typical material costs ranging from $35 to $80 depending on fiber and brand.
Here is the actual investment breakdown using verified 2024 beginner pattern data:
| Item | Typical Requirement | Cost Range |
|---|---|---|
| Worsted weight yarn | About 1,000 yards | $35–$80 |
| Crochet hook | Size 4 or 5.5 mm | $3–$10 |
| Stitch markers | Several | $2–$8 |
| Tapestry needle | 1 | $2–$5 |
| Measuring tape | 1 | $2–$8 |
| Blocking materials | Optional | $0–$40 |
Smart yarn recommendations based on drape, stretch, and budget:
Worsted weight acrylic: Inexpensive, widely available, easy to replace, and suitable for practicing construction. This is your best choice if this is your first garment.
Acrylic wool blend: Generally offers more natural drape and warmth than acrylic alone. A good middle ground between cost and wearability.
Cotton or cotton blend: Useful for warm weather garments, although cotton may be heavier and have less recovery. The neckline band may stretch permanently if you choose pure cotton.
Lightweight DK or sport yarn: Can create a softer and less bulky off the shoulder garment but usually increases stitching time. Not recommended for beginners.
A yarn with moderate drape and some recovery is preferable for the shoulder band. Very heavy yarn can pull the neckline downward, while a stiff yarn can make the band uncomfortable. For more guidance on selecting the right materials, visit our crochet tools section.
The Five Body Measurements You Must Take (That Regular Sweater Patterns Skip)
Conventional bust measurement is not enough for an Crochet off the shoulder sweater design. The garment must also account for the upper torso, shoulder circumference, neckline opening, and the amount of ease needed to remain comfortably positioned.
Record these five measurements before you start:
1. Upper torso circumference: Measure around your body just above your bust, where the neckline band will sit. This is typically 2 to 4 inches smaller than your bust measurement.
2. Shoulder to shoulder width: Measure across your back from the edge of one shoulder to the edge of the other. This determines how wide your neckline opening needs to be.
3. Upper arm circumference: Measure around the fullest part of your upper arm. This ensures your sleeves won’t be too tight when the neckline sits below your shoulders.
4. Neckline/shoulder band circumference: Measure around your shoulders where you want the band to grip. This measurement should be taken while relaxed, not flexed.
5. Desired sweater length: Measure from where the neckline band will sit (below your shoulders) down to where you want the hem. Not from your natural neckline.
Each measurement matters because an crochet off the shoulder sweater has a narrower tolerance than a conventional sweater. Too loose causes slippage, while too tight restricts movement and creates pressure around the upper arms and chest. General garment fitting guidance recommends taking accurate body measurements, checking the pattern schematic and finished measurements, and evaluating fit before continuing with later construction stages.
Gauge 101: Why Your Row Count Matters More Than You Think
Crochet off the shoulder sweaters depend heavily on row gauge, not just stitch gauge, because sleeves attach over a specific number of rows. A mismatch causes sleeves that are too short or too long, or armholes that don’t align.
Row gauge errors can produce sleeves that are too long or too short even when the stitch count appears correct. Gauge bridges the gap between schematic drawings and your finished sweater, and you should never rely solely on pre blocked gauge because fiber weight alters fabric length and width.
Here is how to make a proper gauge swatch:
Step 1: Using your chosen yarn and hook size, crochet a swatch at least 6 inches square in the main stitch pattern specified in your pattern.
Step 2: Wash and dry the swatch the same way you plan to care for the finished sweater. Acrylic may grow, cotton may shrink, and wool may bloom.
Step 3: Lay the dried swatch flat without stretching. Measure how many stitches fit in 4 inches horizontally (stitch gauge) and how many rows fit in 4 inches vertically (row gauge).
Step 4: If your gauge doesn’t match the pattern, adjust your hook size. A larger hook creates looser fabric and fewer stitches per inch. A smaller hook creates tighter fabric and more stitches per inch.
Step 5: Make a new swatch with the adjusted hook size and repeat the washing and measuring process until your gauge matches.
This sounds tedious, but skipping this step is the reason most beginner sweaters don’t fit. A difference of even half a stitch per inch compounds over 100+ stitches into several inches of width error. For detailed guidance on measuring and fitting, check our complete crochet sweater guide.
Building the Ribbed Shoulder Band That Actually Grips
One documented construction approach starts with a shoulder length chain, then works front post and back post double crochet to form ribbing that creates vertical contraction around the shoulders. Patterns commonly emphasize that the chain must be made with the yarn fully stretched to ensure proper fit.
Here are step by step instructions for creating the signature shoulder band:
Step 1: Measure your shoulder band circumference (from the measurements section above) and subtract 1 to 2 inches. This is called negative ease and allows the band to grip without sliding.
Step 2: Chain enough stitches to match this reduced measurement when the chain is gently stretched. For most adults using worsted weight yarn, this is approximately 80 to 100 chains.
Step 3: Join the chain into a round with a slip stitch, being careful not to twist the chain.
Step 4: Work in back loop only double crochet or alternating front post double crochet and back post double crochet for 2 to 3 inches. This creates vertical ribbing that contracts around the shoulders.
Step 5: Before continuing to the body, try the band on. It should sit comfortably below your shoulders and grip firmly enough that it doesn’t slide when you raise your arms. If it’s too loose, remove a few stitches from the foundation chain and rework. If it’s too tight, add a few stitches.
💡 Pro Tip: Test the grip before attaching the body by wearing the band for 10 minutes while moving normally. If it slips even once, it will be unwearable when the weight of the body panels is added.
🔥 Hacks & Tricks: Thread a narrow elastic through the ribbing after completion using a tapestry needle. This adds invisible support and allows you to adjust tension even after the sweater is finished. Use clear elastic thread for light colored yarns.
Optional elastic reinforcement can be added at this stage by crocheting over a strand of elastic thread or by creating a casing for elastic to be threaded through later. For more advanced techniques, explore our crochet sweater tutorials collection.
Constructing the Front and Back Panels (Made to Measure Method)
The 2024 made to measure tutorial demonstrates a front panel beginning with 10 chains plus 2 turning chains, worked in back loop only double crochet for 30 rows to achieve 16 inches width when stretched, followed by 61 extended half double crochet stitches per row over 33 rows to reach approximately 17.5 inches of body length.
Here is how to create front and back panels using the made to measure method:
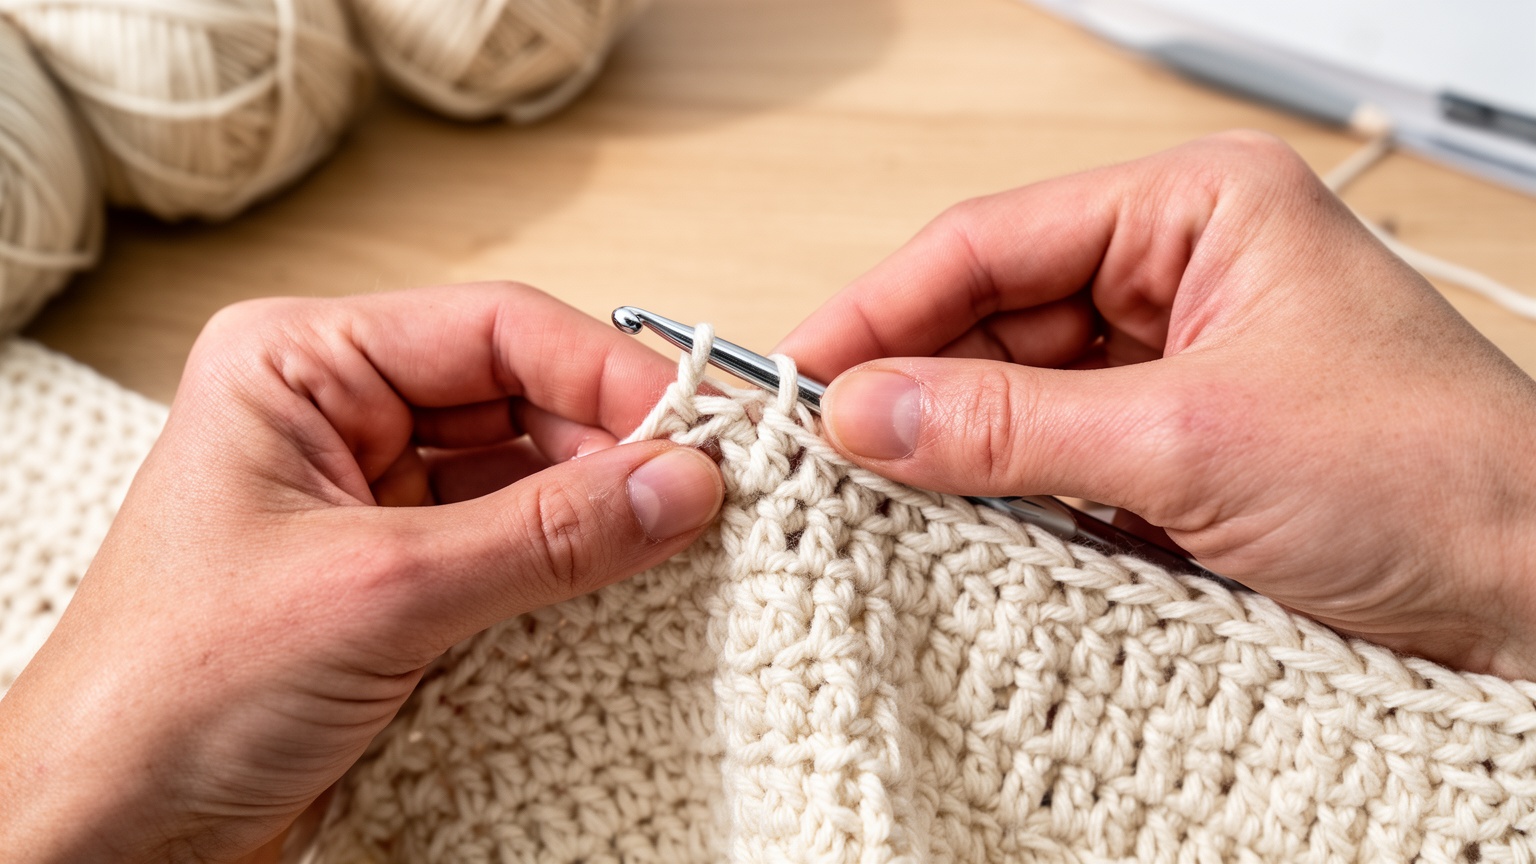
Creating the side band (ribbing that determines panel width):
Chain 12 stitches (or enough to create approximately 4 inches of height when turned sideways). Work in back loop only double crochet, creating one row per chain stitch, until the band measures your desired body width when gently stretched. For most adults, this is 30 to 40 rows to achieve 14 to 18 inches of width.
Pivoting 90 degrees to pick up stitches for the body:
Turn the ribbed band sideways so the short edge becomes the bottom hem. Pick up one stitch in the end of each row along the long edge. If you made 30 ribbing rows, you will pick up approximately 30 stitches.
Working the body to the desired length:
Work in extended half double crochet (or your preferred body stitch) for the number of rows needed to reach your desired sweater length. Based on the 2024 tutorial example, 33 rows of extended half double crochet created approximately 17.5 inches of length.
Creating the neckline opening:
When you reach the point where the panel should attach to the shoulder band (typically 12 to 15 inches up from the hem), begin decreasing at the sides to shape the shoulders. Work the center stitches straight to maintain the neckline width, while decreasing 1 stitch at each edge every row until the panel is narrow enough to attach to the shoulder band.
Ensuring the back panel stays flat:
The back panel is constructed identically to the front, but you may choose to make it slightly longer or add V shaped shoulder panels for better fit. Some patterns use a shaped back with V shaped shoulder panels and sleeves with specified attachment rows.
The critical measurement checkpoint is comparing the width of your finished panel (when gently stretched) to your body measurements plus ease. A conventional sweater can remain wearable even if the fit is slightly off, but an crochet off the shoulder sweater must be precise or the neckline will slide.
Sleeve Construction and the Armhole Attachment Challenge
Sleeves are often crocheted separately and attached to a body with a nonstandard shoulder opening. Patterns may specify different numbers of corresponding rows for sleeve attachment across sizes, making row gauge especially important, and the documented example requires joining sleeves over a specified number of rows then sewing the remaining rows beneath the arms.
Here is how to measure, create, and attach sleeves that actually fit:
Measuring sleeve length by holding the front panel against your body:
Put the front panel against your torso with the neckline positioned below your shoulders. Have someone measure from the point where the armhole begins down to your wrist (or desired sleeve length). Subtract 2 inches for the cuff.
Calculating cuff circumference (wrist plus ease):
Measure your wrist and add 1 to 2 inches of ease. If you want a fitted cuff, add only 0.5 to 1 inch. For a loose, slouchy cuff, add 3 to 4 inches.
Creating shaped sleeves using strategic increases:
Start at the cuff with the number of chains needed to match your cuff circumference. Work in rounds, increasing evenly every 4 to 6 rounds until the sleeve measures the full circumference of your upper arm at the widest point. Continue working even (no increases) until the sleeve reaches the measured length.
Attaching sleeves over a specific row count:
Count the number of rows in the armhole opening on your front and back panels. The sleeve cap must match this row count exactly. Pin the sleeve to the armhole, matching the center of the sleeve cap to the shoulder seam and distributing the remaining sleeve evenly around the armhole. Whipstitch or slip stitch the sleeve in place, working through one loop of each panel to create a flat seam.
Troubleshooting mismatches (too tight, too loose, twisted seams):
If the sleeve cap is too wide for the armhole, remove the last few rounds and add more frequent decreases to narrow it. If the sleeve cap is too narrow, add an extra round or two and ease the fabric slightly as you attach it. If the seam twists, you have likely attached the sleeve inside out or rotated it; remove the seam and reattach with the right side facing out.
Sleeve attachment is where most crochet off the shoulder sweaters fail. A mismatch here creates bunching, gaping, or sleeves that hang incorrectly from the lowered shoulder line.
Assembly Without Tears: Seaming, Alignment, and Try On Checkpoints
Crochet off the shoulder sweaters often use multiple panels and specialized construction. One example is made from four pieces, a front panel, a back panel with V shaped shoulder panels, and two sleeves, followed by whip stitch assembly, creating potential confusion around which rows form the neckline, where shoulder seams begin, and how sleeves attach.
Follow this step by step assembly sequence to avoid tears and frustration:
Step 1: Attach shoulder band to body panels. Pin the shoulder band to the top edge of the front and back panels, distributing the band evenly around the neckline. The band should cover the shaped edges you created when decreasing for the neckline. Whipstitch or slip stitch the band to the panels, working from the inside so the seam is invisible from the right side.
Step 2: Join side seams. With right sides together, pin the front and back panels along the side edges from the hem up to the point where the armhole begins. Whipstitch or slip stitch the seams, leaving the armholes open.
Step 3: Attach sleeves. Following the instructions in the previous section, pin and stitch each sleeve into its armhole, matching row counts carefully.
Step 4: Test fit at each stage. Before weaving in ends or blocking, try on the sweater and check for these common problems:
- Neckline too loose or too tight: If the band slides, you need to add elastic or remake the band with more negative ease. If it’s uncomfortably tight, carefully add 1 to 2 inches to the band circumference.
- Sleeves twisted: Check that the underarm seam of each sleeve aligns with the side seam of the body.
- Uneven shoulders: Make sure the front and back panels are attached symmetrically to the shoulder band.
Step 5: Make adjustments before finishing. It is far easier to adjust seams before you weave in ends and block. If something doesn’t fit, remove the problem seam, adjust, and reattach. This is normal and expected, especially on your first garment. For additional troubleshooting help, visit our crochet fashion styling guide.
The Three Fixes for a Neckline That Keeps Falling Down
If the neckline still slips after construction, recommended modifications include adding a narrow elastic thread, crocheting a casing for elastic, adding a drawstring, making the band narrower but more elastic, or reinforcing the upper edge with slip stitches or single crochet.
Here are three rescue strategies if the sweater is finished but the neckline won’t stay:
Fix 1: Add a narrow elastic thread. Thread a piece of 1/4 inch braided elastic through the ribbing of the shoulder band using a tapestry needle. Secure the ends with a few hand stitches, adjusting the tension until the band grips without being uncomfortable. This is invisible from the outside and fully adjustable.
Fix 2: Crochet a drawstring casing. Work a round of single crochet around the inside top edge of the shoulder band, creating a small channel. Thread a crocheted or braided cord through this casing and tie the ends together. You can tighten or loosen the drawstring as needed for different outfits or activities.
Fix 3: Work a round of slip stitches to tighten the upper edge. Attach yarn to the top inner edge of the shoulder band and work a round of slip stitches through both loops of each existing stitch. Slip stitches are the shortest crochet stitch and will contract the fabric by approximately 10 to 15 percent without adding bulk.
Position these as proactive troubleshooting rather than admissions of failure. Even experienced makers adjust necklines after completion because yarn stretch and body movement are difficult to predict until the garment is worn.
Blocking, Finishing, and Care (Without Destroying the Fit)
Blocking can improve stitch definition and even out panels, but excessive stretching may permanently enlarge the neckline. The shoulder band should be blocked only enough to achieve the intended dimensions, and gauge should be checked after washing because fiber weight alters fabric dimensions.
Here is how to block conservatively so the neckline doesn’t stretch permanently:
Weave in ends cleanly: Use a tapestry needle to weave yarn tails through the back loops of several stitches in a zigzag pattern. Trim close to the fabric but leave about 1/4 inch to prevent unraveling during washing.
Wash gently: Fill a basin with cool water and a small amount of wool wash or mild detergent. Submerge the sweater and gently press to saturate the fibers. Let it soak for 10 to 15 minutes, then drain and press out excess water without wringing or twisting.
Block the body but not the band: Lay the sweater flat on a blocking mat or clean towels. Gently shape the body panels to the intended measurements, pinning the edges if necessary. Do not stretch the shoulder band; simply smooth it into shape. The band needs to retain its elastic grip, and stretching it during blocking can permanently enlarge it.
Dry completely before wearing: Allow the sweater to air dry flat for 24 to 48 hours, depending on humidity. Do not hang it to dry, as the weight of the wet fabric will distort the shoulder band and neckline.
Care for the finished sweater: Hand wash or machine wash on gentle cycle in a mesh bag. Always dry flat, never in a dryer. Store folded rather than hung to prevent the neckline from stretching under the garment’s weight.
Warn against over stretching the shoulder band during blocking. This is the most common finishing mistake and can ruin an otherwise perfect sweater by eliminating the negative ease that keeps the neckline in place.
Your First Off the Shoulder Sweater: Realistic Time and Skill Expectations
Reasonable project estimates based on multi panel construction, neckline work, sleeve assembly, seaming, and finishing suggest an experienced beginner might complete the sweater in approximately 15 to 25 hours, while a first garment project could require 25 to 40 hours, and more complex or highly fitted designs may exceed 40 hours.
Here are honest expectations for completion time and skill prerequisites:
Skill prerequisites: You should be comfortable with double crochet, increasing and decreasing, working in rounds, seaming, and reading a pattern schematic. If you have only made scarves and dishcloths, start with a simpler pullover before attempting an off the shoulder design.
When beginners should tackle this project: After successfully completing at least one rectangular panel garment (like a simple vest or pullover) and demonstrating consistent gauge over multiple swatches. Off the shoulder construction is intermediate level because of the specialized neckline and fit requirements.
Realistic completion time: An experienced beginner working 2 to 3 hours per day can finish in about one to two weeks. A first garment project may take three to four weeks or longer if you need to adjust fit or remake panels.
The work generally includes measuring and making a gauge swatch, crocheting the body, crocheting two sleeves, constructing the shoulder or neckline band, seaming, trying on and adjusting, weaving in ends, and blocking. Each stage has potential pitfalls that require patience and problem solving.
Set honest expectations so you don’t give up halfway through. An off the shoulder crochet sweater is more demanding than a basic pullover, but the finished garment is far more wearable and fashion forward when constructed correctly.
Frequently Asked Questions
How do I keep my crochet off the shoulder sweater from falling down?
Use negative ease by making the shoulder band 1 to 2 inches smaller than your actual shoulder measurement, work the band in elastic ribbing stitches like front post and back post double crochet, and test the grip before attaching the body panels. If it still slips, add a narrow elastic thread through the ribbing or work a round of slip stitches to tighten the upper edge.
What is the best yarn for an off the shoulder sweater?
Choose a yarn with moderate drape and good recovery. Worsted weight acrylic or an acrylic wool blend works well for beginners because it is affordable and has enough stretch to grip without being uncomfortable. Avoid pure cotton for the shoulder band because it has poor recovery and may stretch permanently.
Do I really need to make a gauge swatch for a crochet sweater?
Yes. Row gauge errors can produce sleeves that are too long or too short even when the stitch count appears correct, and off the shoulder sweaters depend heavily on precise row counts for sleeve attachment. Skipping the gauge swatch is the top reason beginner sweaters don’t fit.
How long does it take to crochet an off the shoulder sweater?
An experienced beginner might complete the sweater in approximately 15 to 25 hours, while a first garment project could require 25 to 40 hours. Complex or highly fitted designs may exceed 40 hours. This includes measuring, swatching, crocheting all panels, seaming, adjusting fit, and finishing.
Can I add sleeves to an existing off the shoulder sweater pattern that is sleeveless?
Yes, but you need to calculate the armhole depth and circumference carefully. Measure the armhole opening, crochet sleeves that match that circumference at the cap, and attach them by whipstitching or slip stitching over the specified number of rows. Test fit before permanently attaching to ensure the sleeve hangs correctly from the lowered shoulder line.
Free Pattern Delivery
Get Your FREE Crochet Pattern PDF
Love this pattern? Enter your name and email below to get your free printable crochet pattern PDF delivered straight to your inbox!