Every stitch tells a story · Free PDF Pattern with Weekly Newsletter Claim Free Guide →
Every stitch tells a story · Free PDF Pattern with Weekly Newsletter Claim Free Guide →
Off-the-shoulder crochet blouse: 5 Amazing Style Secrets
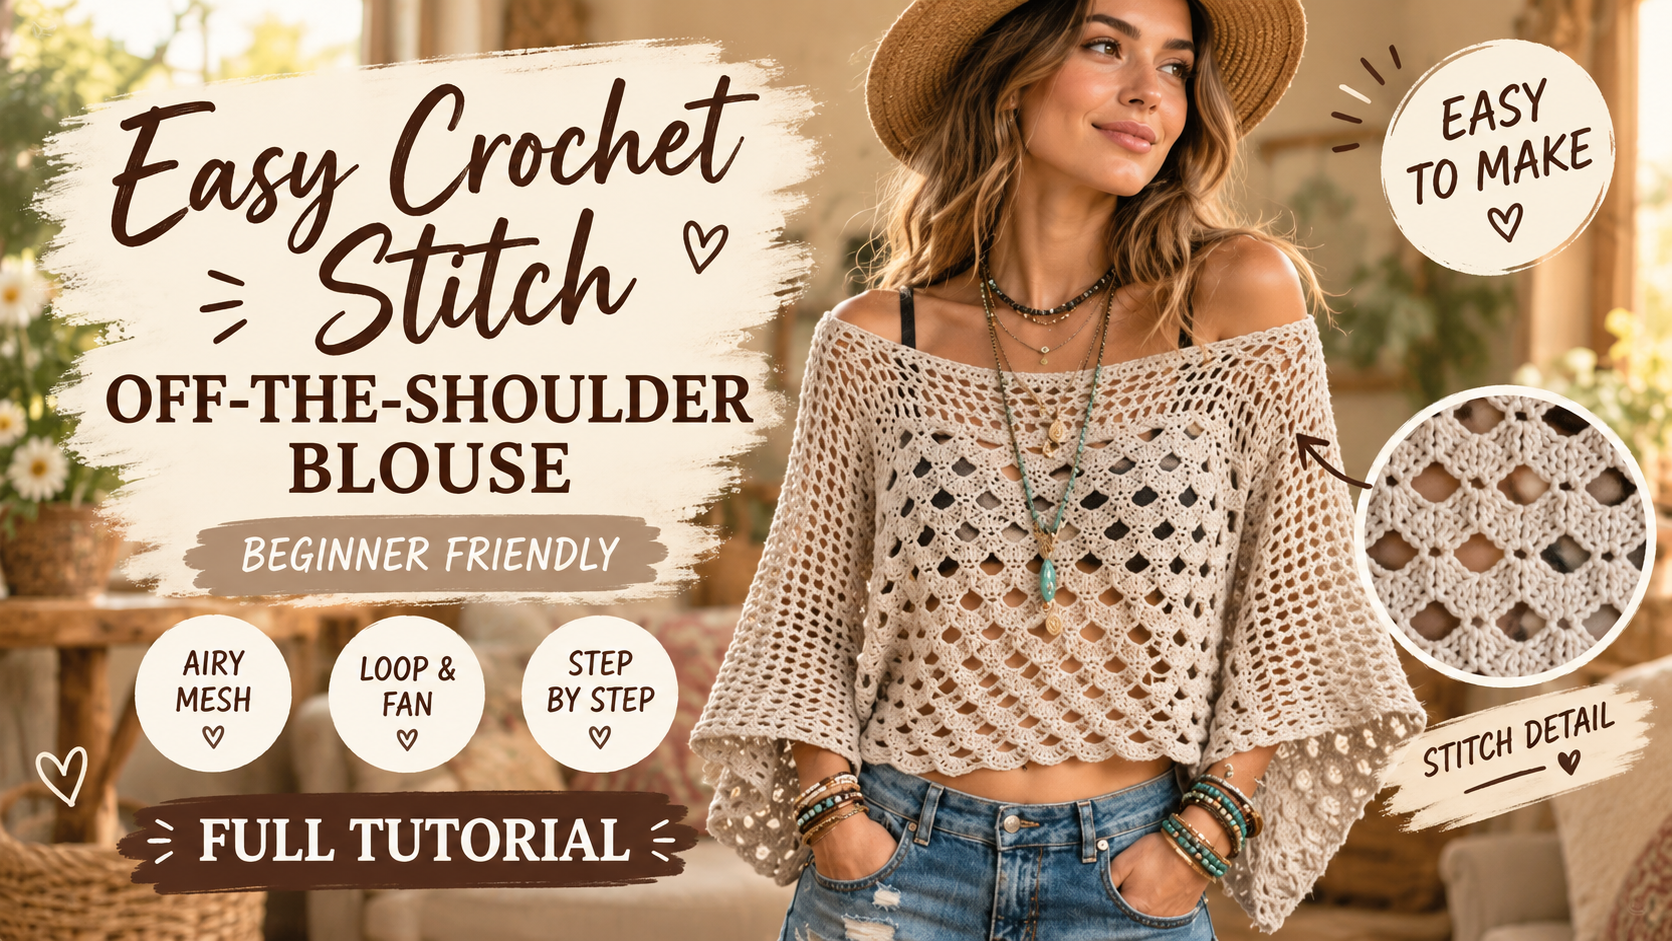
The Off-the-shoulder crochet blouse is a relaxed beginner crochet pattern made from two matching rectangular panels, with open mesh rows alternating with loop-and-fan rows. It is for crocheters who know how to chain, double crochet, and single crochet and want a wearable project with adjustable width, length, neckline, and arm openings. The two panel construction keeps shaping simple: shoulder and side seams create the neckline and arm openings, with optional short sleeve extensions worked afterward.
Table of Contents
Porcelain Petal Off-the-Shoulder Blouse
Key Takeaways
- Make two matching flat panels, then seam the shoulders and sides while leaving openings for the neckline and arms.
- This is a beginner pattern for crocheters who know chain, double crochet, and single crochet.
- Customize the relaxed fit by changing panel width and length or by placing the side seams inward or outward.
Pattern Overview
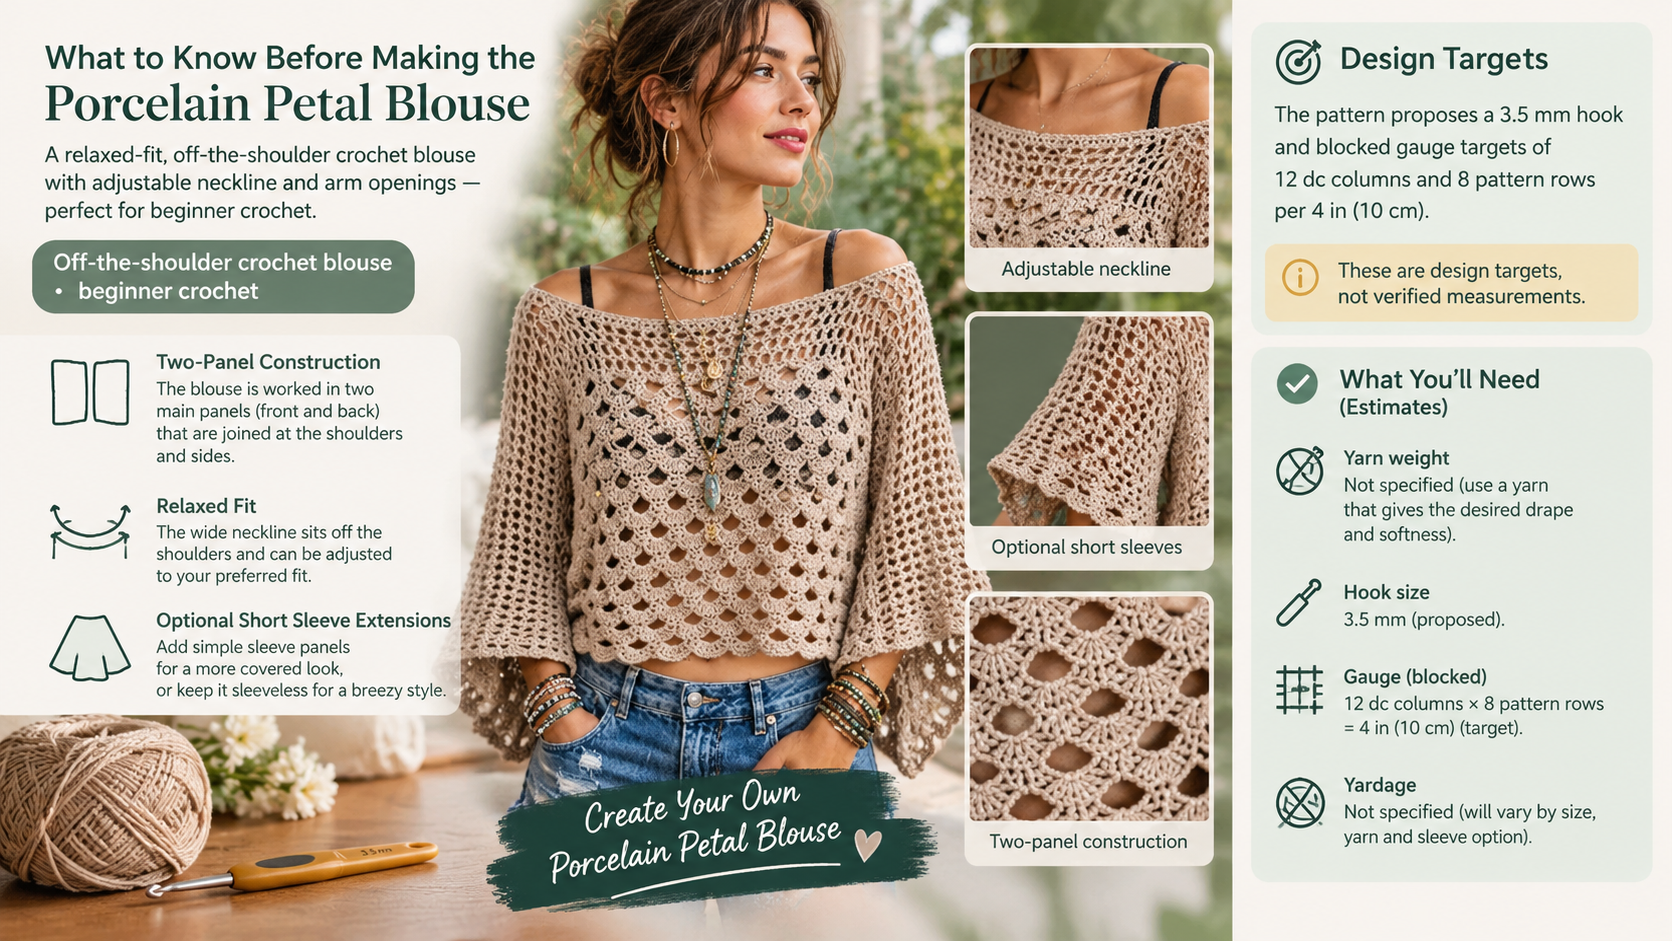
Description: A relaxed off-the-shoulder crochet blouse made from two matching rectangular panels. Open mesh rows alternate with loop-and-fan rows.
Style: Customizable with a relaxed fit. Sew the side seams farther inward for a closer fit or farther outward for a looser fit.
Construction method: Crochet two flat panels from hem to neckline, then seam the sides and shoulders, leaving openings for the arms and neckline. Separate sleeves are not required. Optional short sleeve extensions are included.
Skill level: Beginner. You should know how to chain, double crochet, and single crochet. The special stitch sequence is explained in the instructions.
Finished measurements: The size chart gives approximate finished bust circumference and body length. The neckline and arm openings are shaped during assembly, so their final measurements depend on seam placement.
Pattern status and sizing assumptions: The notes do not include a yarn weight, gauge, sample measurements, or tested size range. This is a carefully calculated, made-to-measure draft, not a verified pattern. The XS to 5X chart is a starting range based on the gauge stated here. Make and wash a swatch before beginning, then check fit as you work.
For more garment construction guidance, browse crochet sweater tutorials and crochet sweater patterns. You can also read about crochet sweater pattern sizing.
Materials
- Yarn: Charme yarn in Porcelain, or a comparable yarn that meets gauge. The yarn weight and yardage for the specified Charme yarn were not provided. Check the ball band and use the estimates below only as planning amounts.
- Hook: 3.5 mm crochet hook, or the hook needed to meet gauge.
- Notions: Measuring tape, tapestry needle, stitch markers, and scissors.
- Optional supplies: Blocking mats and rustproof pins, a row counter, and contrasting yarn for temporary markers.
For hook and blocking essentials, see the crochet tools collection.
Gauge and Terms
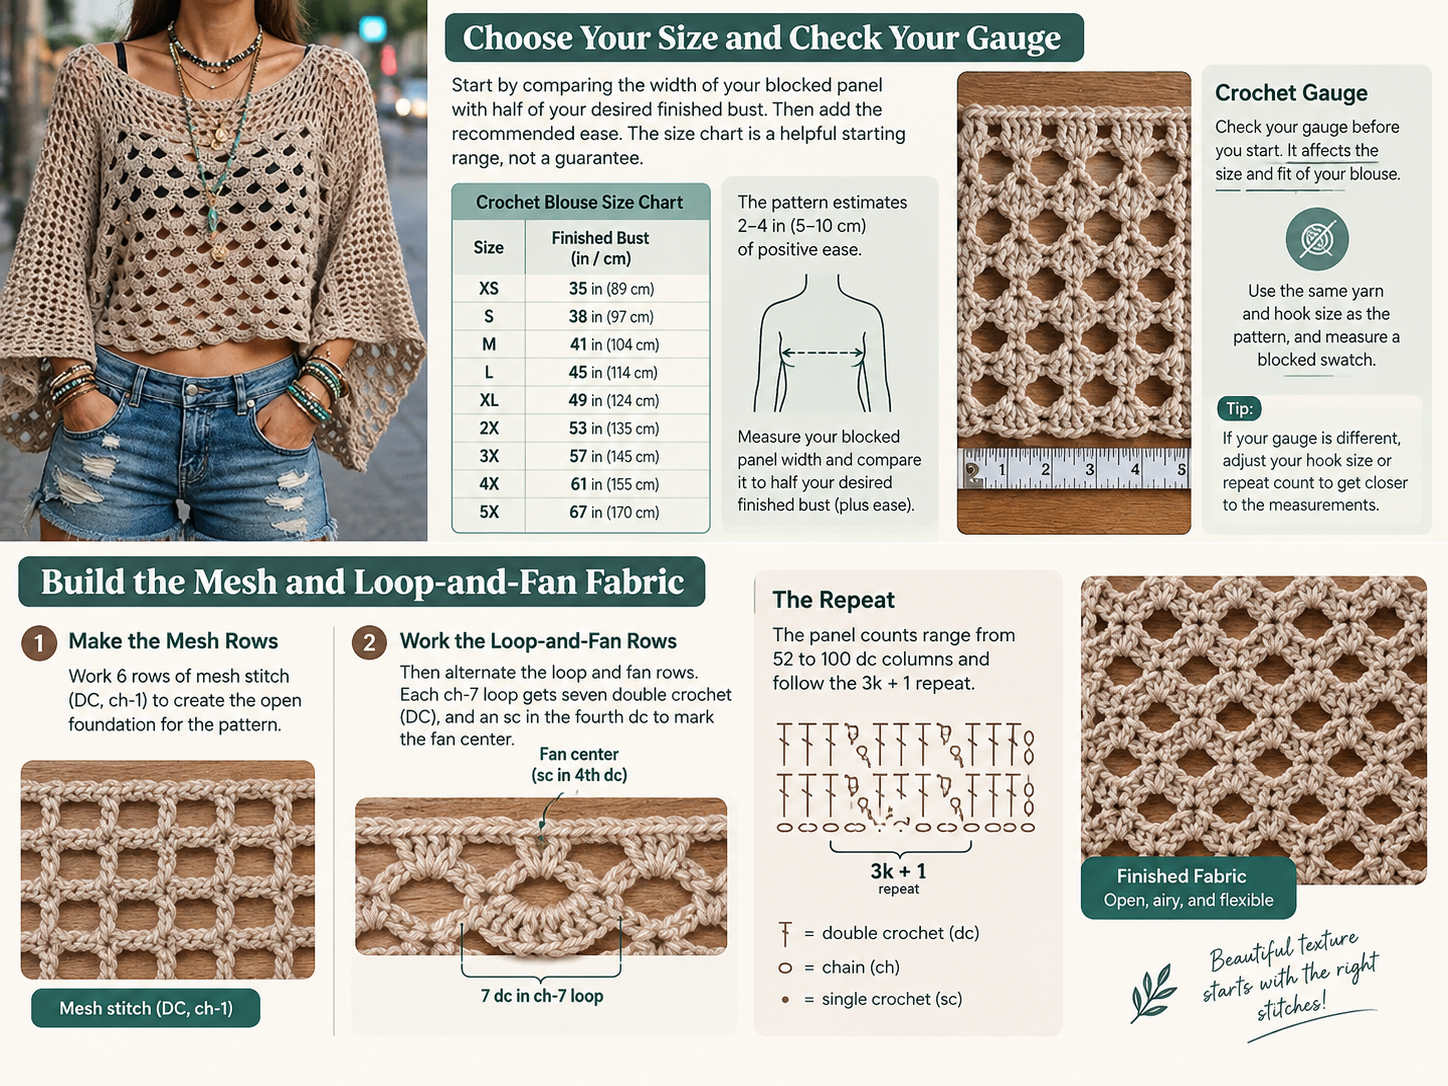
US crochet terminology is used. Gauge is measured on a blocked swatch in the mesh-and-fan pattern.
- Stitch gauge: 12 double crochet columns across 4 in (10 cm).
- Row gauge: 8 pattern rows across 4 in (10 cm).
These are design targets for calculating the chart, not gauge measurements supplied with the original notes. Because mesh and fan rows may vary in height, use the same stitch sequence for your swatch that you will use for the blouse. If your swatch differs, adjust your hook or recalculate the panel width and row count.
Make a swatch at least 6 in (15 cm) wide and 5 in (12.5 cm) tall using the mesh and fan sequence. Wet-block or wash it as you plan to treat the finished blouse, let it dry, and measure the central 4 in (10 cm). Count the double crochet columns for stitch gauge and the rows for row gauge. Do not stretch the swatch while measuring.
At 12 columns per 4 in, there are 3 columns per inch. Each panel is approximately half the finished bust circumference: columns per panel = panel width in inches × 3. The chart uses panel counts that fit the loop repeat and rounds the resulting finished bust to the nearest inch. For standard crochet terminology references, see the Craft Yarn Council crochet abbreviations, yarn weight system, and care symbols.
Abbreviations
- ch = chain
- sc = single crochet
- dc = double crochet
- st(s) = stitch(es)
- sp = space
- rep = repeat
- RS = right side, the public-facing side of the fabric
- WS = wrong side, the inside of the fabric
Size Chart
Finished bust is the approximate garment circumference before any extra width created by relaxed, outward seam placement. The panel counts shown beneath the chart are dc columns per panel and help you match the chart to the pattern repeats.
| Size | Bust/Width | Length | Sleeve Length | Yarn Required |
|---|---|---|---|---|
| XS | 35 in (89 cm) | 20 in (51 cm) | Arm opening; optional 3 in (8 cm) | 700–850 yd (640–780 m) |
| S | 39 in (99 cm) | 21 in (53 cm) | Arm opening; optional 3 in (8 cm) | 800–950 yd (730–870 m) |
| M | 43 in (109 cm) | 22 in (56 cm) | Arm opening; optional 3 in (8 cm) | 900–1,100 yd (820–1,005 m) |
| L | 47 in (119 cm) | 23 in (58 cm) | Arm opening; optional 3½ in (9 cm) | 1,000–1,200 yd (915–1,100 m) |
| XL | 51 in (130 cm) | 24 in (61 cm) | Arm opening; optional 3½ in (9 cm) | 1,100–1,350 yd (1,005–1,235 m) |
| 2X | 55 in (140 cm) | 25 in (64 cm) | Arm opening; optional 4 in (10 cm) | 1,250–1,500 yd (1,145–1,370 m) |
| 3X | 59 in (150 cm) | 26 in (66 cm) | Arm opening; optional 4 in (10 cm) | 1,400–1,700 yd (1,280–1,555 m) |
| 4X | 63 in (160 cm) | 27 in (69 cm) | Arm opening; optional 4½ in (11 cm) | 1,550–1,850 yd (1,420–1,690 m) |
| 5X | 67 in (170 cm) | 28 in (71 cm) | Arm opening; optional 4½ in (11 cm) | 1,700–2,050 yd (1,555–1,875 m) |
Yardage is a provisional estimate, not a verified requirement. It assumes a light-to-medium yarn and open, lacy fabric. Charme yarn’s weight and yardage per ball were not specified. Make a swatch and weigh it to estimate your own requirement: compare the yarn used for a known swatch area with the total estimated panel area, then allow extra for seams and finishing.
Complete Crochet Pattern
Make 2 panels. Use the same size and number of rows for both. The turning ch 4 at the start of a mesh row counts as 1 dc and 1 ch-sp. Do not work into it at the end of that row. The mesh pattern is a row of dc columns separated by ch-1 spaces. The loop row makes a ch-7 loop between every third dc column. A fan is 7 dc worked into one ch-7 loop, with the sc in the fourth dc marking the fan center.
Use stitch markers to identify the first and last dc columns and the shoulder and side seam positions. The size chart assumes approximately 2–4 in (5–10 cm) of positive ease. Ease is the difference between the garment measurement and the wearer’s body measurement. The blouse is made from rectangles, has no shaped sleeve caps, and forms arm openings by leaving portions of the side seams unsewn. A beginner can sew the panels with a tapestry needle and a flat mattress seam, taking one edge stitch from each panel at a time.
Body Panels
Foundation chain
Choose your size and use the number of dc columns per panel below. Each count is 3 × a whole number + 1, which allows the loop row to end at the correct edge.
| Size | dc columns per panel |
|---|---|
| XS | 52 |
| S | 58 |
| M | 64 |
| L | 70 |
| XL | 76 |
| 2X | 82 |
| 3X | 88 |
| 4X | 94 |
| 5X | 100 |
- Make a slip knot. Foundation chain: Ch 2 × the number of dc columns, plus 3. For example, XS:
2 × 52 + 3 = 107 ch. The extra chains provide the height and spacing needed for Row 1.
Mesh section
- Row 1 (RS): Dc in the 5th ch from hook; the skipped chains count as the first dc and ch-1 space. *Ch 1, skip next ch, dc in next ch; rep from * across. You should have the number of dc columns selected for your size. Turn.
- Rows 2–6: Ch 4 (counts as dc and ch-1 sp), skip the first dc, dc in next dc, *ch 1, skip next ch-sp, dc in next dc; rep from * across. Turn.
- At the end of Row 6, the panel should have the same number of dc columns as Row 1. Count them before proceeding.
Loop-and-fan section
- Loop row: Ch 1, turn. Sc in the first dc. *Ch 7, skip the next 2 dc, sc in the next dc; rep from * across. With the chart’s column counts, the last sc should fall in the last dc. You should have one fewer loop than dc columns.
- Fan row: Ch 1, turn. *Work 7 dc into the next ch-7 loop. Sc in the 4th dc of those 7 dc; rep from * across. The sc marks the center of each fan. Work into every loop.
- Repeat: Repeat the Loop row and Fan row until the panel measures the length listed for your size, measured from the top edge to the hem. Finish after a Fan row. If your length is between rows, finish after the current Fan row rather than adding a partial pattern repeat.
- Row-count guide: The design gauge estimates about 2 rows per inch, but the loop-and-fan rows may change the actual length. The chart lengths correspond roughly to 40–56 rows total, counting the 6 mesh rows and then alternating loop and fan rows. Use the tape measure as your final guide.
- Fasten off, leaving a long tail for seaming. Make the second panel to match the first.
Sleeve Panels
The construction forms arm openings but does not include separate sleeves. Leave the openings as they are, or add short sleeve extensions after assembling the blouse. This optional sleeve extension has no separate size grading. Try it on as you work and keep both sleeves the same number of rounds.
- After assembling the blouse, mark the arm opening with stitch markers. Make sure both openings are the same size.
- Join yarn at the underarm seam with a sl st. Ch 1 and sc evenly around the opening. Do not pull the stitches tight. Join with a sl st to the first sc.
- Round 1: Ch 3 (counts as dc), dc in each sc around. Join with a sl st to the top of the beginning ch-3.
- Round 2: Ch 4, skip the next dc, dc in the next dc, *ch 1, skip next dc, dc in next dc; rep from * around. Adjust the last repeat as needed to meet the beginning chain; join with a sl st.
- For a longer sleeve, repeat Round 2 until the sleeve is the desired length, then fasten off. Repeat for the other arm opening.
Assembly
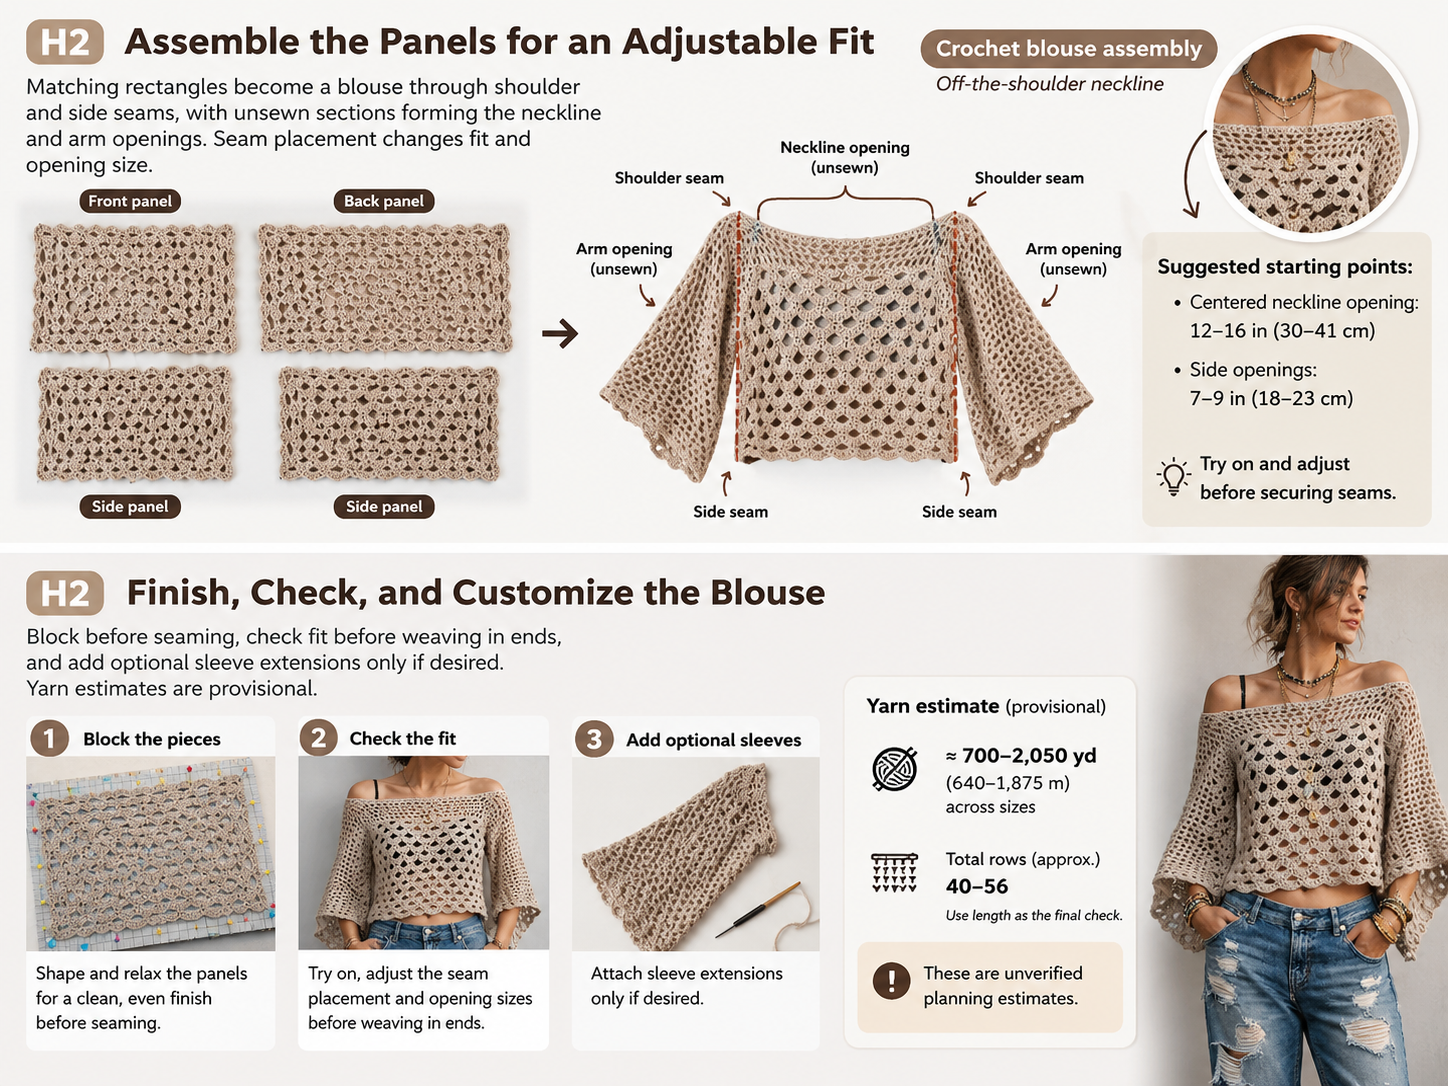
- Prepare the panels: Block both panels to the same dimensions before sewing. Place them with the RS facing inward and align the edges.
- Sew the shoulders: At the top edges, sew inward from each outer edge toward the center, leaving a centered opening for the neckline. For a wide off-the-shoulder neckline, leave approximately 12–16 in (30–41 cm) open as a starting point. Try the blouse on over your head and adjust this opening before securing the seam.
- Sew the sides: Starting at each hem, sew upward along the side edges. Leave the top section unsewn for each arm opening. A 7–9 in (18–23 cm) opening is a starting point; compare it with your upper arm and shoulder placement, and make both sides equal.
- Adjust the fit: Try on the blouse before weaving in the ends. If the body is too loose, sew the side seams farther inward. If it is too close-fitting, unpick the seam and sew closer to the original edges.
- Neckline and edges: The neckline can be left as a simple panel edge. For a neater finish, join yarn and work one round of sc loosely around the neckline. Do not make the edging tight, or the opening may no longer sit comfortably off the shoulders. Work one loose round of sc around each sleeve opening if desired.
- Optional sleeve extensions: Add the short sleeves from the sleeve section after the side seams are finished.
Custom Adjustments
Keep the loop repeat at 3k + 1 columns when changing the panel width. The formulas and options below preserve the given pattern calculations.
Customization
- Width: At the stated gauge, add 3 dc columns per panel for each 1 in (2.5 cm) of additional finished bust circumference. The loop pattern needs
3k + 1columns. Add columns in groups of 3 to preserve this repeat. Add twice as many foundation chains as added columns:additional foundation chains = 2 × additional dc columns. Example: To add about 4 in (10 cm) around the body, add 12 dc columns per panel and 24 foundation chains per panel. To decrease width, remove 3 dc columns per panel for each 1 in (2.5 cm) less finished bust circumference, while keeping the total at3k + 1. - Length: At the stated row gauge, add approximately 2 rows per 1 in (2.5 cm). Add complete loop-and-fan pairs, 2 rows at a time, so the pattern ends after a Fan row. Actual length depends on yarn and blocking; measure the panel as you work.
- Sleeves: The arm opening is set by how much of the side seam you leave unsewn. Increase the opening by unsewing or shortening the side seam; decrease it by sewing farther toward the shoulder. For optional sleeve extensions, add one complete mesh round per approximately ½ in (1.25 cm) of sleeve length, using your blocked row gauge as the final check.
- Neckline: Adjust the shoulder seam length during assembly. The starting opening for a wide off-the-shoulder neckline is approximately 12–16 in (30–41 cm). Try the blouse on over your head and adjust the opening before securing the seam. A tight neckline may need a larger center opening; a slipping neckline may need a smaller one or a more secure shoulder seam.
Finishing
- Weave in all yarn ends with a tapestry needle, threading each end through several stitches on the WS.
- Wet-block or steam-block only as permitted by the yarn label. Shape both panels to matching dimensions and allow them to dry fully before assembly.
- Try on the blouse after seaming. Check the finished bust, body length, neckline opening, and arm openings. Adjust the seams before securing the remaining ends.
- Recheck the measurements after blocking. Some yarns, particularly cotton or other plant fibers, can relax and grow; avoid stretching the garment while it dries.
Troubleshooting
| Problem | Solution |
|---|---|
| My panel edges are uneven. | Check that the turning ch 4 counts as a dc and ch-1 space, and that you skip the first dc on each mesh row. Count the dc columns at the end of every row. |
| My swatch is wider or narrower than the gauge. | If you have too many stitches across 4 in, try a larger hook; if you have too few, try a smaller hook. Rewash and measure the swatch before choosing a size. If changing hooks does not produce a fabric you like, recalculate the foundation using your measured stitch gauge. |
| The blouse is too tight or too loose. | Compare the blocked panel width with half the desired finished bust. Adjust by changing the dc columns per panel, or move the side seams inward or outward. Keep the repeat count at 3k + 1. |
| The neckline slips or feels too tight. | Before finishing the seams, try the blouse on and adjust the shoulder-seam length. A tight neckline may need a larger center opening; a slipping neckline may need a smaller one or a more secure shoulder seam. |
| The fans look uneven. | Check that every ch-7 loop contains 7 dc and that the sc is placed in the 4th dc of each fan. Use a marker in the first fan center if you lose track. |
| I may run out of yarn. | Compare the yarn used for your swatch with the amount available, and weigh a completed panel if possible. Buy an additional ball from the same dye lot before starting the second panel if your estimate is close. The chart yardage is provisional. |
Pattern Summary
- Size range: XS–5X, based on the stated gauge and size assumptions.
- Yarn amount: Approximately 700–2,050 yd (640–1,875 m), depending on size; verify against your yarn and swatch.
- Hook size: 3.5 mm, or size needed to meet gauge.
- Main stitch: Double crochet mesh with chain spaces, alternating with chain loops and 7-dc fans.
- Construction method: Two matching rectangular panels, seamed at the shoulders and sides to create the neckline and arm openings. Optional short sleeve extensions are worked around the openings.
For more garment inspiration, explore crochet fashion ideas and the crochet sweater pattern fit guide.
Conclusion
The Porcelain Petal blouse pairs two straightforward rectangular panels with open mesh and loop-and-fan texture. Work a blocked gauge swatch, choose a starting size from the XS to 5X chart, and measure as you crochet. Adjust the panel width and length using the stated formulas, then fine tune the neckline and arm openings during assembly. Make the Off-the-shoulder crochet blouse your own by choosing the seam placement and deciding whether to add short sleeve extensions. Gather your yarn and hook, make your swatch, and follow the pattern from the foundation chain through finishing.
Watch the Step by Step Crochet Tutorial
Watch the Step by Step Crochet Tutorial
Follow the video tutorial to see the construction, crochet techniques, and assembly process explained visually.
Watch the complete crochet tutorial below and follow along with the written pattern.
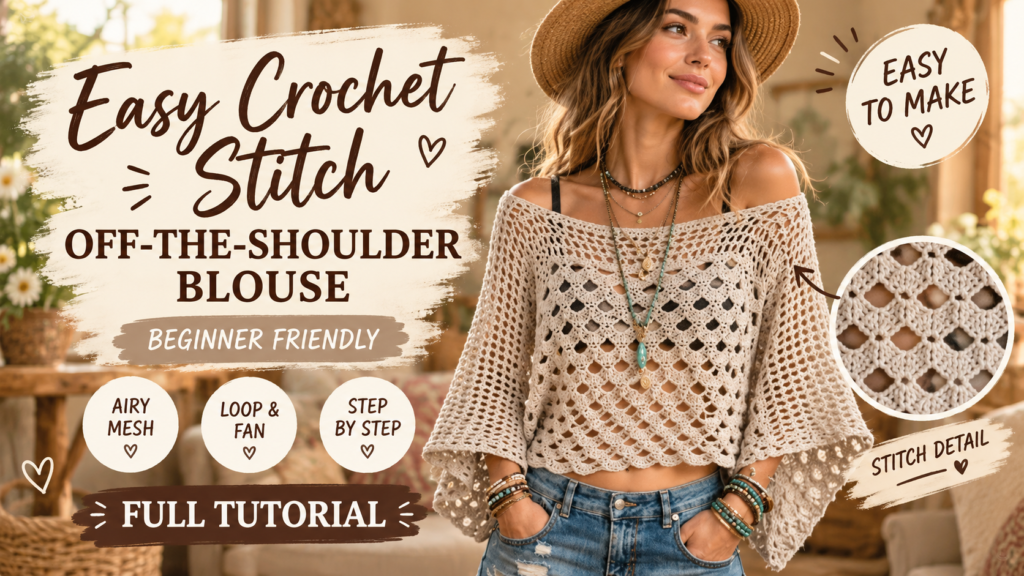
Use the play button to watch the tutorial without leaving this page.
Frequently Asked Questions
Is this off-the-shoulder crochet blouse suitable for beginners?
Yes. It is labeled beginner level. You should know how to chain, double crochet, and single crochet. The special mesh and loop-and-fan sequence is explained in the pattern.
How many panels do I make?
Make 2 matching panels using the same size and number of rows. They are joined at the shoulders and sides during assembly.
Does the pattern include full sleeves?
No separate sleeves are required. The side seams leave arm openings. Optional short sleeve extensions can be worked around the openings, and the pattern does not provide separate size grading for them.
How do I choose a size?
Use the chart as a starting range, based on the stated gauge and size assumptions. It assumes approximately 2–4 in (5–10 cm) of positive ease. Make and wash a swatch, check the blocked panel width, and try on the blouse as you work.
How can I change the fit or length?
Use the width and length formulas in Customization. Side seam placement can also make the body closer fitting or looser. Adjust the neckline and arm openings during assembly and check the fit before securing the seams.
Free Pattern Delivery
Get Your FREE Crochet Pattern PDF
Love this pattern? Enter your name and email below to get your free printable crochet pattern PDF delivered straight to your inbox!