Every stitch tells a story · Free PDF Pattern with Weekly Newsletter Claim Free Guide →

Every stitch tells a story · Free PDF Pattern with Weekly Newsletter Claim Free Guide →
Crochet Off The Shoulder Sweater: 5 Amazing Ways to Crochet Free
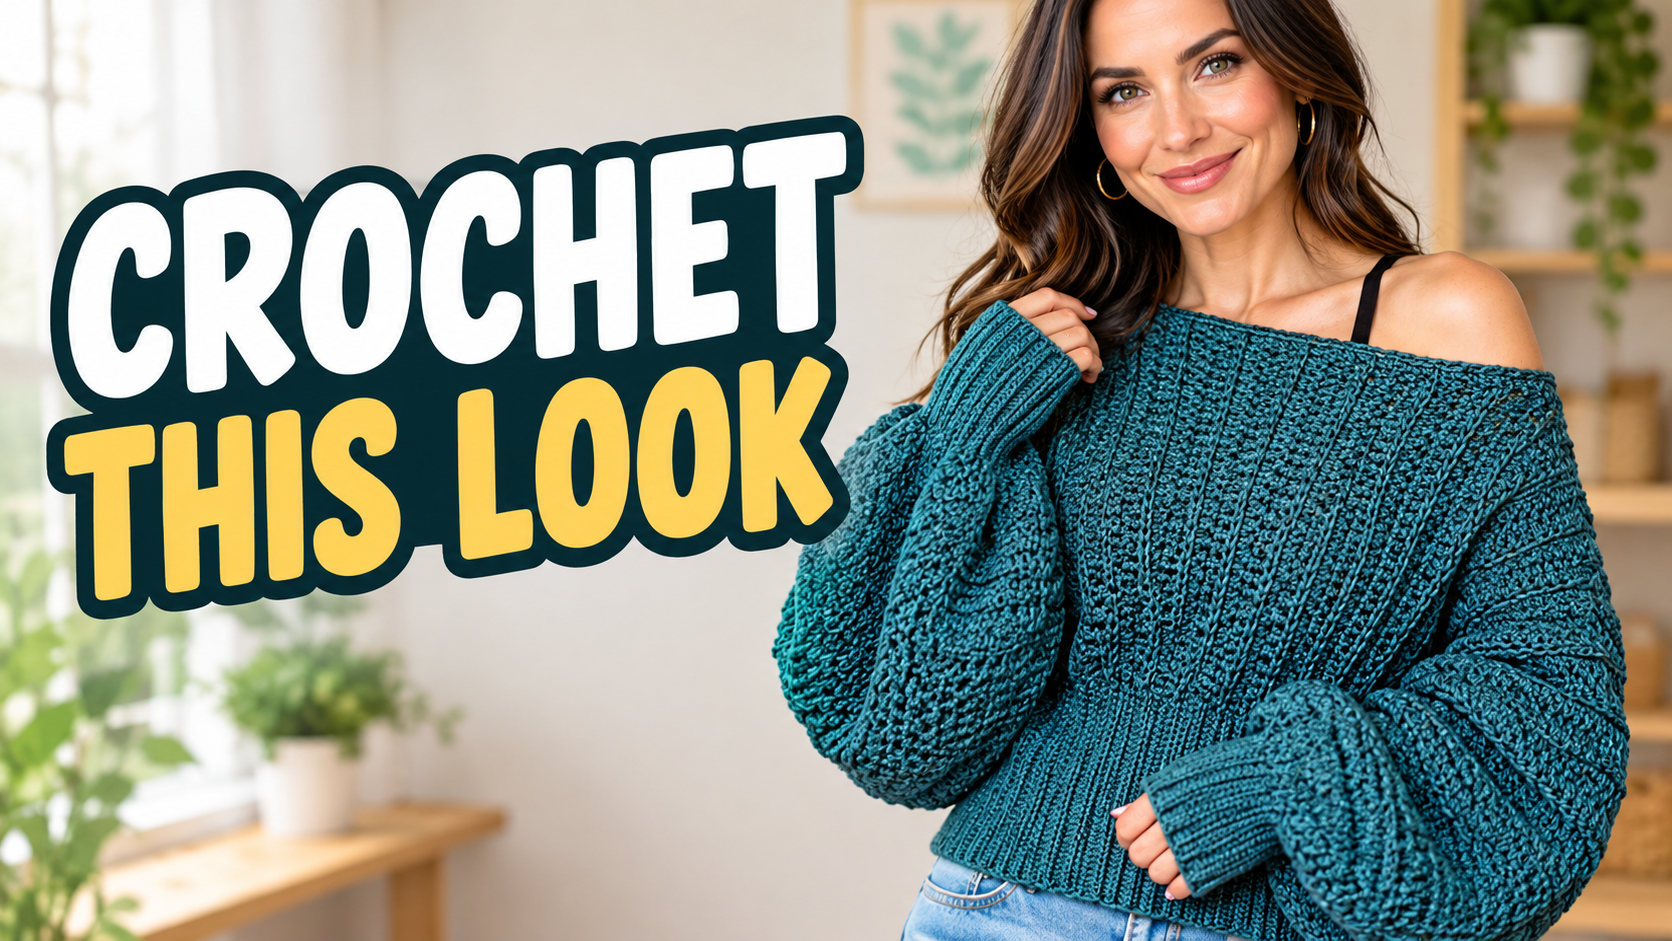
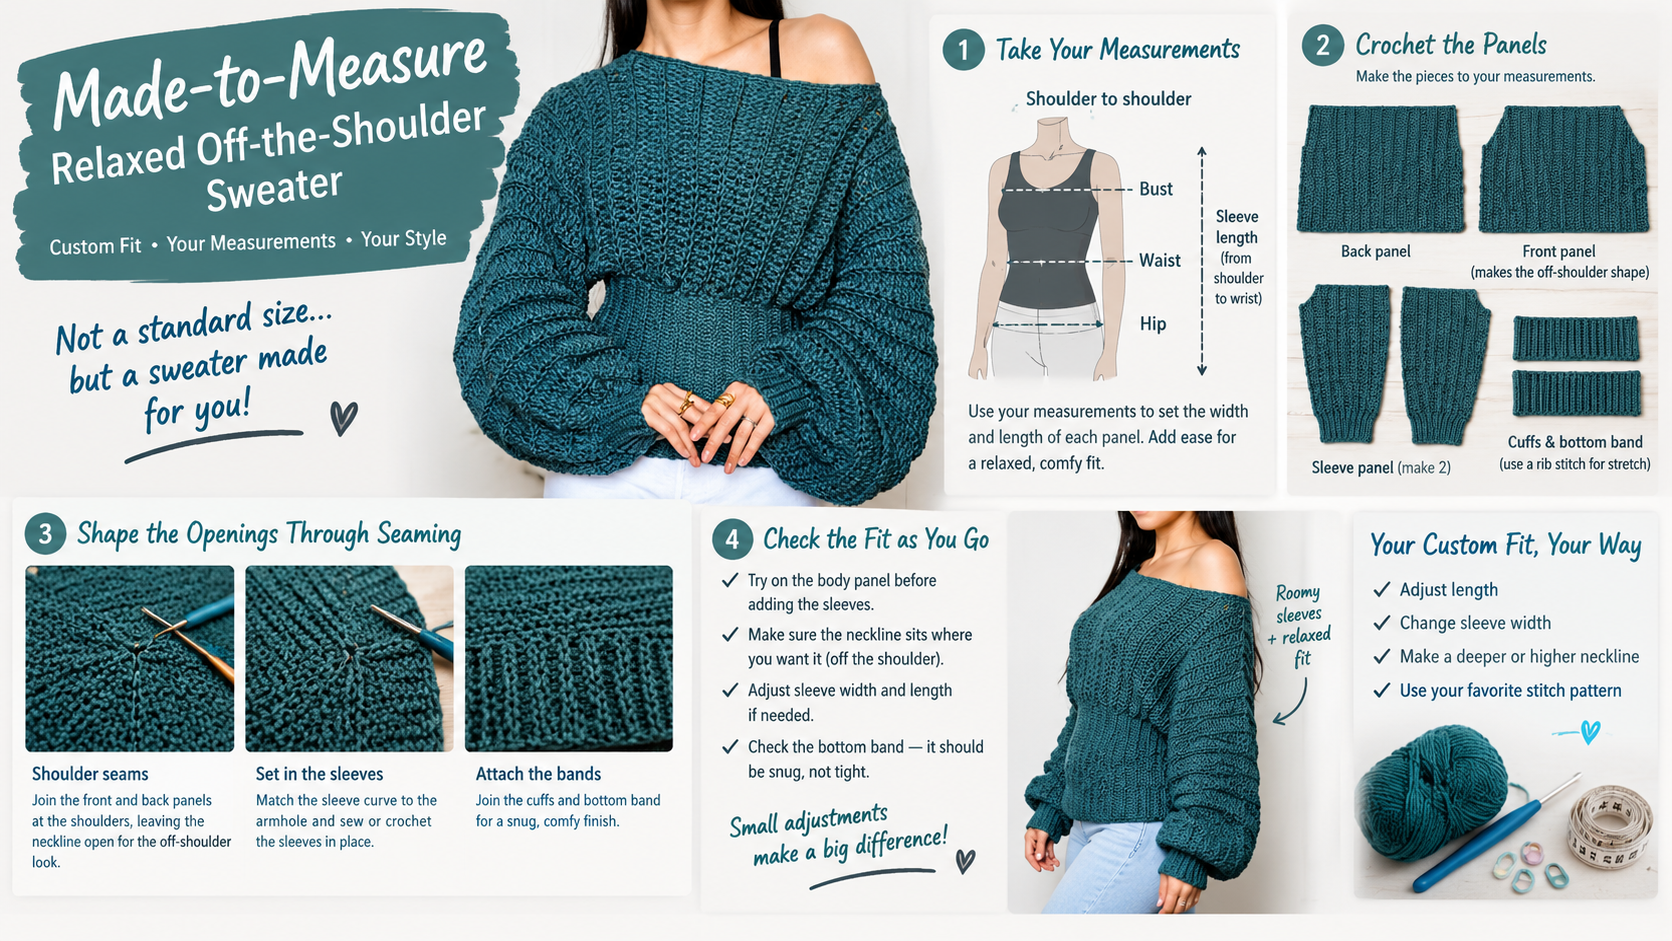
crochet off the shoulder sweater makers can create a relaxed, sweatshirt inspired top with textured panels, full sleeves, thumb hole cuffs, and a ribbed hem. This beginner friendly pattern is for crocheters comfortable with basic stitches who are ready to measure, seam, and work stitches into row ends. Its two rectangular panels make the body construction approachable, while made to measure calculations let you choose the body width, length, sleeve length, and shoulder opening for the wearer.
Table of Contents
Introduction
Use this off the shoulder neckline guide alongside the written instructions if you want more help thinking through the neckline fit.
Key Takeaways
- The body is made from two flat rectangular panels seamed at the shoulders and sides, with sleeves worked around the armholes.
- The pattern is beginner friendly with guidance; measuring, seaming, and working into row ends require care.
- Made to measure calculations let you adjust the panels and openings to the wearer rather than follow a fixed standard size grade.
Pattern Overview
- Description: A relaxed, off the shoulder sweater style top with a simple textured body, full sleeves, thumb hole cuffs, and a ribbed hem.
- Style: Oversized, sweatshirt inspired fit. The shoulder opening and finished ease are adjustable.
- Construction method: Two flat rectangular panels are seamed at the shoulders and sides. Sleeves are worked around the armholes; cuffs and hem are added afterward.
- Skill level: Beginner friendly with guidance. The project uses basic stitches, but measuring, seaming, and working into row ends require care.
- Finished measurements: This is a made to measure pattern, not a fixed graded pattern. Measure the wearer and use the formulas below. The supplied sample notes, two panels about 24 in (61 cm) wide and 30 rows long, describe a reference sample, not a reliable fit for every size.
Sizing note: “All sizes” is achieved by measuring and adjusting the panels, rather than by selecting a standard XS to 5XL stitch count. The supplied notes do not include a complete size grade, tested gauge, or target ease. Do not assume the reference panel dimensions will fit every wearer. For additional fit help, see this crochet sweater pattern sizing guide.
Materials
- Yarn: Category 4 (medium/worsted) yarn, approximately 510 g / 915 yd (836 m) for the reference sample. Larger or longer versions may require more.
- Hooks: 9 mm for body and sleeves; 5.5 mm for neckline, cuffs, and bottom band.
- Notions: Stitch markers, yarn needle, scissors, and measuring tape.
- Optional tools: Blocking mat and pins, row counter, and a second hook for holding stitches.
Browse more crochet tools and maker essentials before starting, or explore other crochet sweater patterns.
Gauge and Terms
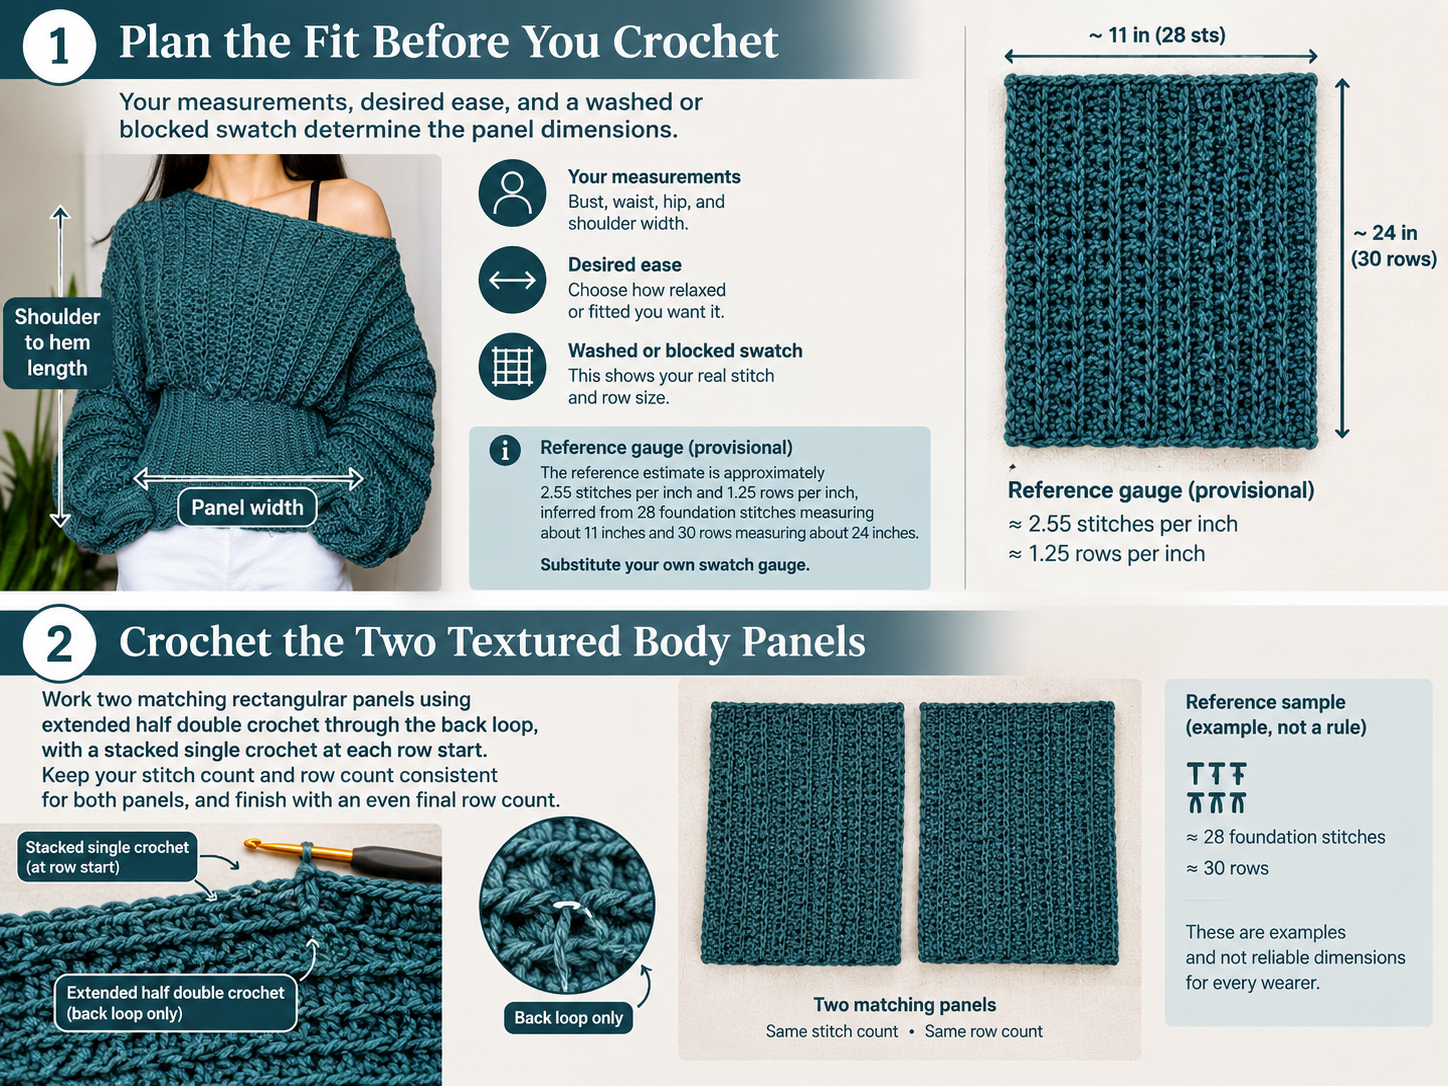
US crochet terminology is used. The supplied information does not give a verified swatch gauge. It gives approximate sample measurements from which a provisional reference gauge can be estimated:
- Stitch gauge: 28 foundation stitches measure about 11 in (28 cm), or approximately 2.55 stitches per inch.
- Row gauge: 30 rows measure about 24 in (61 cm), or approximately 1.25 rows per inch.
These estimates depend on interpreting the 28 stitch foundation as the panel’s length and the 30 rows as its width. They are not a substitute for making and measuring a swatch.
How to check gauge: With the 9 mm hook, make a swatch of extended half double crochet worked in the back loop. Measure only the central fabric, not the edges. Wash and dry or block the swatch as you plan to treat the finished top, then measure stitches per inch and rows per inch. If you have more stitches per inch than the reference, use a larger hook; if you have fewer, use a smaller hook. Recheck before calculating panel counts.
- BLO = back loop only
- ch = chain
- ehdc = extended half double crochet
- hdc = half double crochet
- sc = single crochet
- sl st = slip stitch
- st(s) = stitch(es)
- yo = yarn over
Extended half double crochet (ehdc): Yo, insert hook in the indicated stitch, yo and pull up a loop, yo and pull through the first loop on the hook, yo and pull through all 3 remaining loops.
Stacked single crochet: At the beginning of a row, work 1 sc in the first stitch. Insert the hook under the two loops of that new sc, yo and pull up a loop, then yo and pull through both loops. This makes a taller starting stitch. It counts as 1 stitch.
A row is one pass across the fabric. A round is a complete circuit around an opening. Work the body in rows and turn at the end of each row unless stated otherwise. Work the main fabric in BLO by inserting the hook under the back loop only and leaving the front loop unworked; this creates horizontal ridges. The starting stitch of each body row is a stacked single crochet, counts as 1 stitch, and does not need a turning chain.
Size Chart
This pattern is custom fit. Measurements are calculated from the wearer’s measurements; there are no fixed finished measurements for standard sizes.
| Size | Bust/Width | Length | Sleeve Length | Yarn Required |
|---|---|---|---|---|
| Custom XS–5XL | Finished bust circumference = wearer’s bust + chosen ease; each panel width = finished circumference ÷ 2 | Measure from shoulder area to desired hem | Measure from armhole to wrist; reference sample is about 16.5 in (42 cm) | About 510 g / 915 yd for the reference sample; purchase extra for larger or longer versions |
Panel length calculation: Measure from the shoulder area to the desired hem. Use your swatch stitch gauge to calculate foundation stitches: foundation stitches = desired panel length in inches × stitches per inch.
Panel width calculation: rows per panel = desired panel width in inches × rows per inch. Round to the nearest even number of rows, then recheck the measured fabric. The two panels together create the body circumference before accounting for the shoulder and side seams.
Complete Crochet Pattern
Before starting, choose a finished garment circumference larger than the wearer’s body circumference for a relaxed fit. The supplied notes do not specify a tested ease amount. Divide the chosen finished circumference by 2 to find each panel width. The instructions describe a side seamed rectangular body and do not specify exact armhole depth or neckline width, so measure and mark both before seaming. Keep both panels the same size and finish them after an even number of rows. The reference sample’s approximately 28 foundation stitches and 30 rows are examples only.
Body Panels
Make 2 matching panels, one front and one back.
- Measure and calculate: Choose the finished body circumference and divide it by 2 for the width of each panel. Choose the desired shoulder to hem length and use the swatch stitch gauge to calculate the number of foundation stitches. Use the swatch row gauge to calculate the number of rows needed for the panel width, rounding to an even number. Make a short test section and measure it. Adjust the calculations if your actual fabric does not match the target.
- Foundation Row: Using the 9 mm hook, make a foundation row of ehdc. This foundation row replaces a starting chain and forms the lower edge of the panel. Work the calculated number of foundation ehdc stitches. Turn. Count: ___ sts.
- Row 1: Work 1 stacked sc in the first stitch. Work 1 ehdc BLO in each remaining stitch across. Turn. Count: ___ sts.
- Row 2: Work 1 stacked sc in the first stitch. Work 1 ehdc BLO in each remaining stitch across. Turn. Count: ___ sts.
- Repeat: Repeat Row 2 until the panel reaches the calculated width, ending after an even numbered row. Keep the stitch count the same on every row.
- Fasten off. Make a second identical panel. If your edges are uneven, count the stitches at the end of each row. The stacked sc counts as the first stitch; do not work an extra stitch into it.
Sleeve Panels
Make two sleeves, working around each armhole opening.
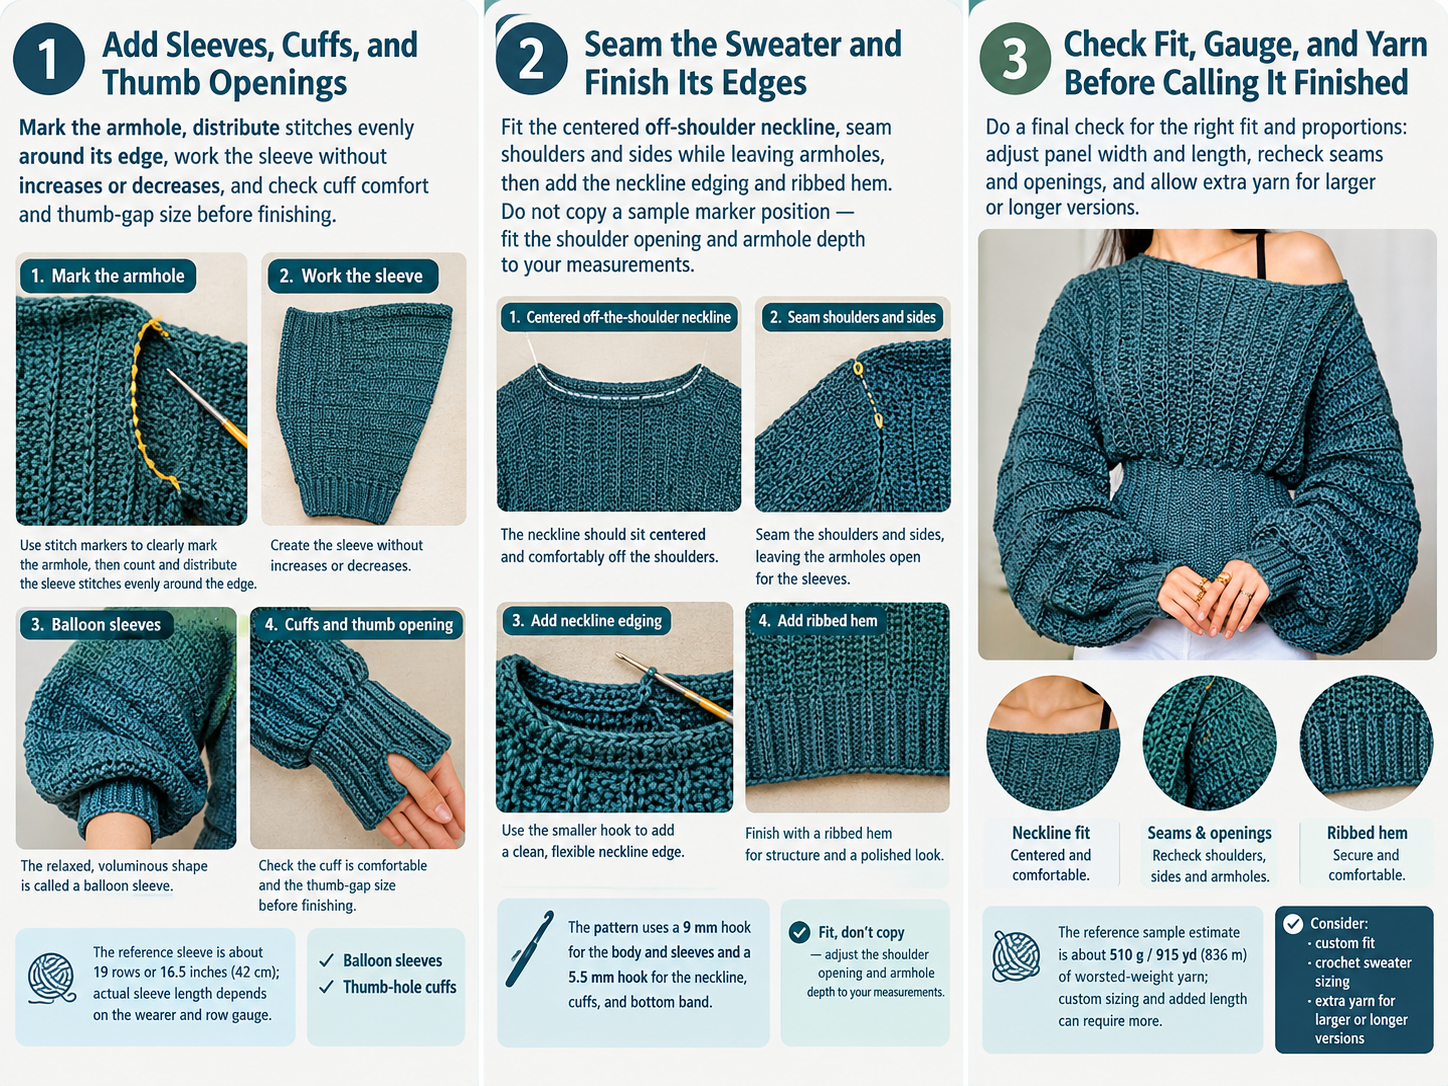
- With the panels positioned as they will be worn, measure and mark the armhole opening. The side seam should stop at the wearer’s underarm, leaving enough opening for comfortable movement.
- Join the 9 mm hook and yarn at the bottom corner of the armhole.
- Work ehdc BLO evenly around the armhole opening. Distribute stitches evenly along the row ends and shoulder edge; avoid crowding stitches or leaving large gaps.
- Place a marker in the first stitch of the round. Work even in ehdc BLO, without increasing or decreasing, until the sleeve measures the chosen length from the armhole to the wrist. The reference sleeve is about 19 rows / 16.5 in (42 cm), but row height varies by crocheter and yarn.
- Try the sleeve on before making the second one. Confirm the circumference and length.
- Cuff cinch: Switch to the 5.5 mm hook. Work sc around the wrist, working into every other stitch to reduce the circumference. Try it on before continuing. If the cuff edge is uncomfortably tight, work into more stitches instead.
- Cuff band: Ch about 12, approximately 3.5 in (9 cm), depending on your yarn and tension. Cuff Row 1: Sl st BLO in the second ch from hook and in each ch across. Turn. Cuff Row 2: Ch 1; sl st BLO in each stitch across. Turn. Repeat Cuff Row 2 until the band fits comfortably around the wrist and reaches the cuff opening. Do not stretch the band while measuring.
- Fasten off, leaving a long sewing tail. Wrap the band around the wrist edge. Join the short ends with an outside loop slip stitch seam, leaving an opening of about 6 cuff stitches for the thumb. Adjust the gap to fit the wearer comfortably. Repeat for the second sleeve.
Assembly
- Shoulder and neckline: Lay the two panels on top of each other, right sides together if desired. The foundation rows should align at the hem.
- Try the panels on or pin them to a garment with a similar fit. Along the top edges, mark the shoulder seam limits, leaving a centered opening large enough to pass over the head and sit off the shoulders.
- The supplied sample places markers about 8 side rows in from the outer edges. Use that only as a starting reference: row width varies with gauge, and the opening must be fitted to the wearer.
- Seam from each outer shoulder edge inward to its marker using a flat ladder style seam. Alternate the yarn needle between matching loops on the two panel edges, drawing the yarn snug but not tight.
- Seam the side edges from the hem upward, stopping at the underarm to leave the marked armhole opening. Repeat on the other side. Try on the top before finishing the seams. Adjust shoulder seam length if the neckline sits too high or slips too low.
- Neckline finish: With the 5.5 mm hook, join yarn at a shoulder seam. Neckline Round 1: Work sc evenly around the neckline, using approximately 2 sc per side row along row edges. Along horizontal stitch edges, work about 1 sc per stitch. Adjust as needed to keep the edge flat, without puckering or flaring. Join.
- Neckline Round 2: Ch 1; work 1 sc BLO in each stitch around. Join and fasten off. The two sc per side row instruction is an approximate edge rate, not a fixed count. Increase or reduce the number of stitches if the neckline waves or pulls in.
- Bottom band: With the 5.5 mm hook, join yarn at a side seam. Work a fitted sc round around the hem, using approximately 2 sc per side row along row edges and about 1 sc per stitch along the foundation edge. Adjust the count so the hem lies flat. Join.
- To make the band, ch about 40, approximately 10 in (25 cm); actual depth depends on gauge. Band Row 1: Work hdc in the back bumps of the chain across. Turn. Band Row 2: Ch 1; work hdc BLO across. Turn. Band Row 3: Ch 1; work sl st BLO across. Turn.
- Alternate Band Rows 2 and 3 until the band, relaxed and unstretched, fits around the hem. Join the band ends with an outside loop slip stitch seam. Attach the band to the hem with an even seam, easing only slightly if needed. Do not stretch the body edge to force it to fit.
- Invisible joins in rounds: For a simple joined round, work a sl st into the first stitch to close the round. This may create a visible join or an extra looking stitch; do not count the joining sl st as a stitch unless your pattern explicitly says to. A less visible finishing method is to remove the hook from the working loop and draw the yarn tail through the first stitch to imitate a stitch top. This method needs practice and is a finishing technique, not a replacement for counting the round. For this beginner version, use a standard sl st join and mark the first stitch of each round.
For more step by step seaming and construction help, visit the crochet sweater tutorials collection or read the crochet sweater mistakes and construction guide.
Custom Adjustments
Use measurements taken from your blocked swatch.
- To increase width: Desired panel width in inches × row gauge = target number of rows. If you need to add width to an existing panel: additional rows = added width in inches × rows per inch. Keep the final row count even. Each added row increases the panel width by approximately 1 ÷ row gauge inches.
- To increase length: Desired added length in inches × stitch gauge = additional foundation stitches. Add those stitches to the foundation row. Each added foundation stitch increases panel length by approximately 1 ÷ stitch gauge inches.
- To adjust sleeve length: Additional rows = added sleeve length in inches × sleeve row gauge.
- To adjust sleeve circumference: Adjust the number of stitches picked up around the armhole. Approximate added stitches = desired circumference increase in inches × stitch gauge around the sleeve. Check that the armhole opening and sleeve circumference remain compatible.
- To adjust cuff depth: Add or remove chains from the cuff foundation. Each chain changes cuff depth by approximately 1 ÷ cuff stitch gauge inches.
- To adjust the thumb opening: Leave a larger or smaller gap in the cuff seam. Try on the cuff before securing the seam.
- To adjust the neckline: Measure and mark the shoulder seam limits while trying on the panels or pinning them to a similar fitting garment. Leave a centered opening large enough to pass over the head and sit off the shoulders. Adjust the shoulder seam length before completing the neckline edging if it sits too high or slips too low.
Customization
This made to measure crochet sweater pattern uses your blocked swatch and wearer measurements instead of fixed size counts. Divide the chosen finished body circumference by 2 to determine each panel width. Calculate rows from panel width and row gauge, then round to an even number of rows. Calculate foundation stitches from shoulder to hem length and stitch gauge.
- Width: Desired panel width in inches × row gauge = target number of rows. For an existing panel, additional rows = added width in inches × rows per inch.
- Length: Desired added length in inches × stitch gauge = additional foundation stitches.
- Sleeves: Additional rows = added sleeve length in inches × sleeve row gauge. Approximate added stitches for circumference = desired circumference increase in inches × stitch gauge around the sleeve.
- Neckline: Fit the centered opening on the wearer and adjust shoulder seam length before edging. The pattern does not specify a fixed neckline width.
Finishing
- Weave in all ends securely, taking care not to pull the fabric out of shape.
- Wet block or steam block only according to the yarn label. Shape the body panels to your calculated measurements and let them dry completely before final assembly if you have not already seamed them.
- Do not stretch the neckline or cuffs while blocking.
- Check that the finished garment matches your chosen body circumference, length, sleeve length, and neckline opening. Because this is a made to measure design, final measurements depend on your swatch and choices.
Troubleshooting
| Problem | Solution |
|---|---|
| The panel edges are uneven. | Count stitches after every row. Confirm that the stacked sc counts as the first stitch and that you work into the final stitch of the previous row. |
| My gauge does not match the reference estimate. | Measure a washed or blocked swatch. Use your actual gauge in the formulas; do not force the fabric to match the estimate by changing tension. |
| The top is too tight or too loose. | Recheck the panel width and the desired ease before seaming. Adding rows changes width; adding foundation stitches changes shoulder to hem length. |
| The neckline pulls, flares, or sits in the wrong place. | Adjust the shoulder seam length before completing the neckline edging. For a wavy edge, work fewer sc; for a puckered edge, work more evenly spaced sc. |
| The sleeve opening has gaps or puckers. | Redistribute the ehdc stitches around the armhole. Work more evenly into the row ends and avoid placing too many stitches in one spot. |
| The cuff is too tight. | Work sc into more than every other stitch, or use a larger hook. Make the thumb gap comfortable before seaming. |
| I may run out of yarn. | Weigh the yarn before starting and buy extra where possible. Longer panels, wider sleeves, and larger sizes use more yarn; the reference estimate of 510 g / 915 yd is not guaranteed for custom measurements. |
Use the troubleshooting approach of identifying the issue, counting, locating its source, fixing it, and then continuing. Keep stitch counts steady where the pattern calls for even work.
Pattern Summary
- Final size range: Custom made to measure; suitable for a range of sizes when measurements and stitch counts are calculated for the wearer.
- Yarn amount: About 510 g / 915 yd for the reference sample; allow extra for larger or longer versions.
- Hook size: 9 mm for body and sleeves; 5.5 mm for neckline, cuffs, and hem.
- Main stitch: Back loop extended half double crochet.
- Construction method: Two rectangular panels, seamed at shoulders and sides; sleeves worked around armholes; ribbed neckline, cuffs, and bottom band added afterward.
Conclusion
This beginner friendly crochet off the shoulder sweater pattern combines two textured body panels, sleeves worked around the armholes, and ribbed neckline, cuffs, and hem. Its made to measure formulas help you select panel width and length, sleeve measurements, and a comfortable neckline opening. Swatch, measure, and check the fit before finishing the seams. Gather your yarn and hooks, take your measurements, and follow the pattern step by step to make your own customized top.
For more inspiration, browse crochet fashion ideas and other sweater tutorials.
Watch the Step by Step Crochet Tutorial
Watch the Step by Step Crochet Tutorial
Follow the video tutorial to see the construction, crochet techniques, and assembly process explained visually.
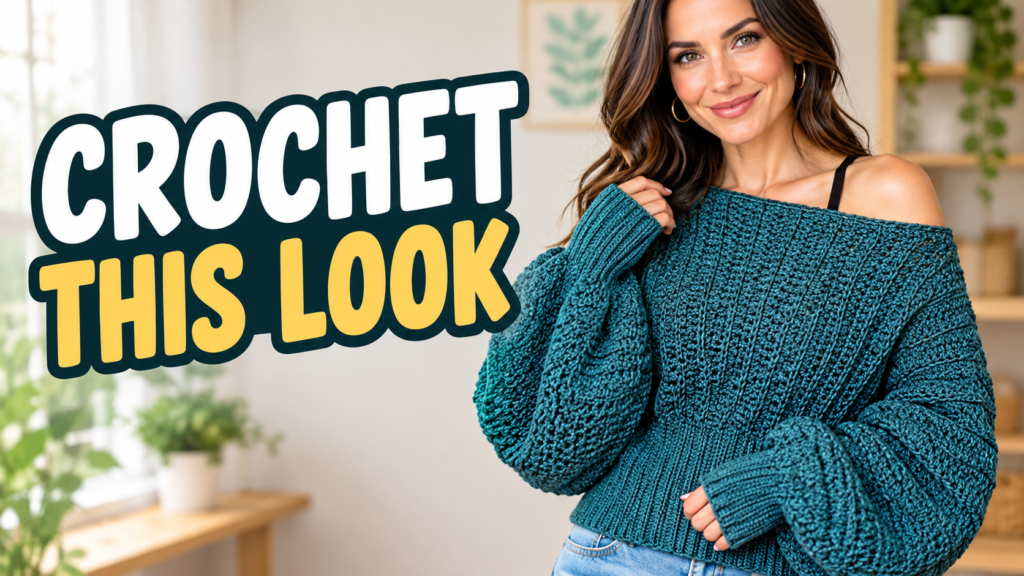
Use the play button to watch the tutorial without leaving this page.
FAQ
Is this crochet off the shoulder sweater pattern beginner friendly?
Yes. It is beginner friendly with guidance and uses basic stitches. Measuring, seaming, and working into row ends require care.
Does the pattern include fixed XS to 5XL stitch counts?
No. It is made to measure, not a fixed graded pattern. Measure the wearer and use your swatch gauge and the provided formulas. The reference panel notes are not a reliable fit for every size.
What yarn and hooks do I need?
Use Category 4 medium or worsted yarn, approximately 510 g / 915 yd (836 m) for the reference sample. Use a 9 mm hook for the body and sleeves and a 5.5 mm hook for the neckline, cuffs, and bottom band. Larger or longer versions may require more yarn.
How do I calculate the body panel size?
Divide the chosen finished body circumference by 2 for each panel width. Calculate foundation stitches as desired panel length in inches × stitches per inch. Calculate rows per panel as desired panel width in inches × rows per inch, then round to the nearest even number of rows.
How do I keep the neckline and cuffs comfortable?
Fit and mark the shoulder seam limits on the wearer before seaming, leaving a centered opening that passes over the head and sits off the shoulders. Try on the cuff before completing it, work into more stitches if it feels too tight, and adjust the thumb gap for comfort.
Free Pattern Delivery
Get Your FREE Crochet Pattern PDF
Love this pattern? Enter your name and email below to get your free printable crochet pattern PDF delivered straight to your inbox!