Every stitch tells a story · Free PDF Pattern with Weekly Newsletter Claim Free Guide →

Every stitch tells a story · Free PDF Pattern with Weekly Newsletter Claim Free Guide →
Vintage Catghan Sweater: 5 Amazing Fit Tips Guide
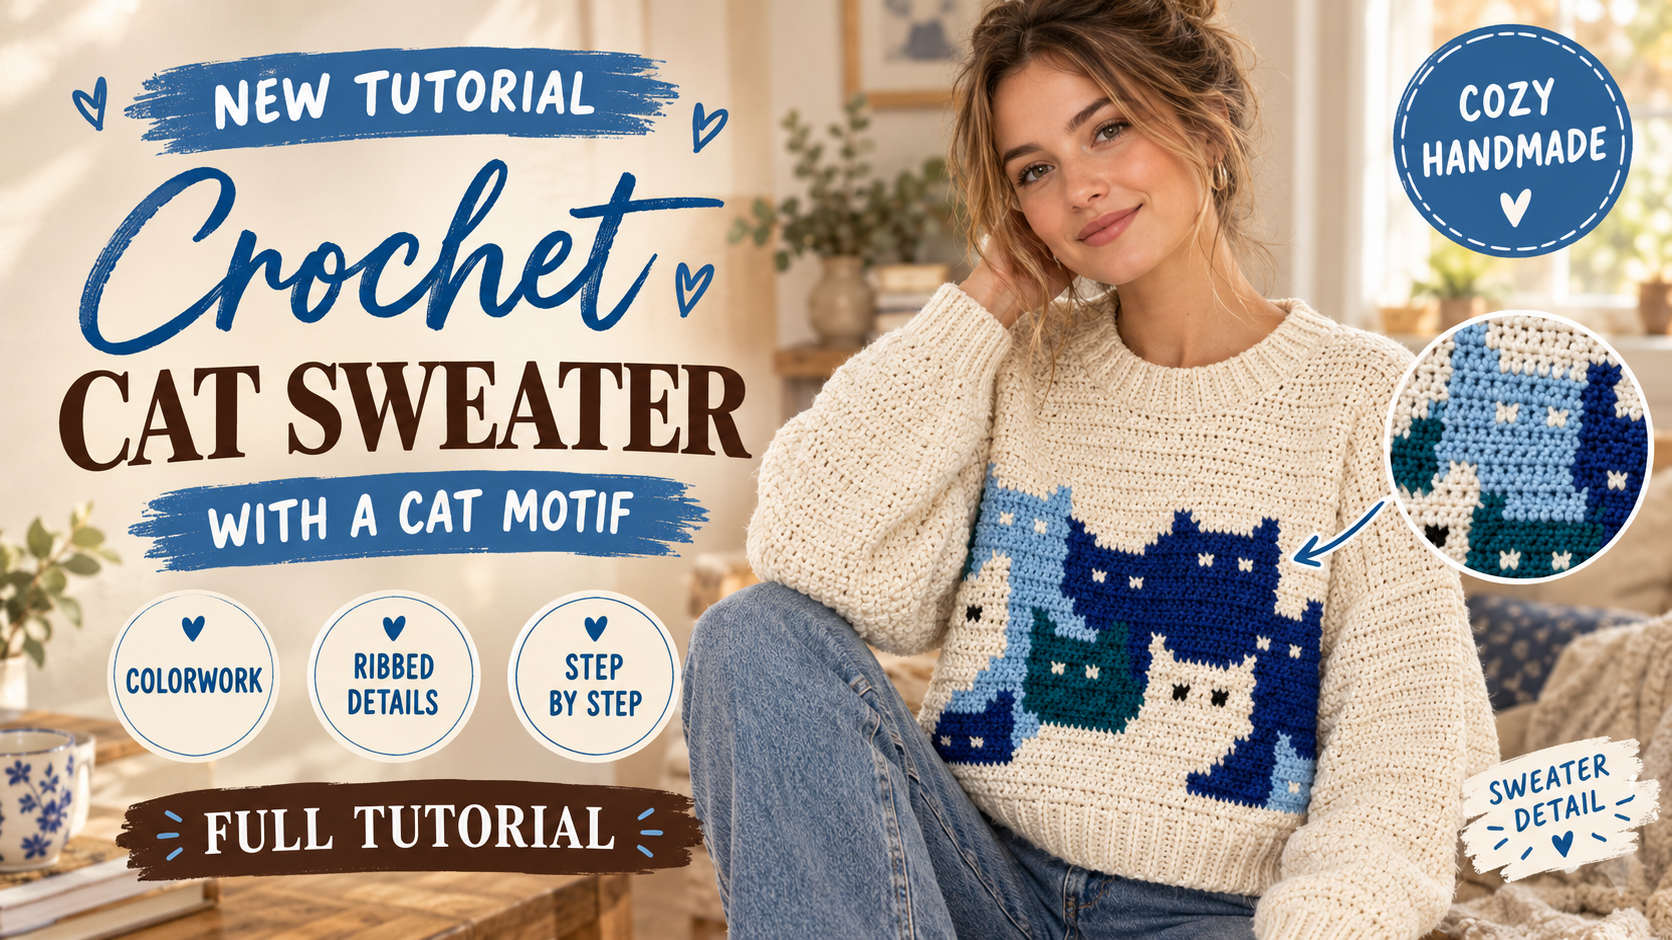
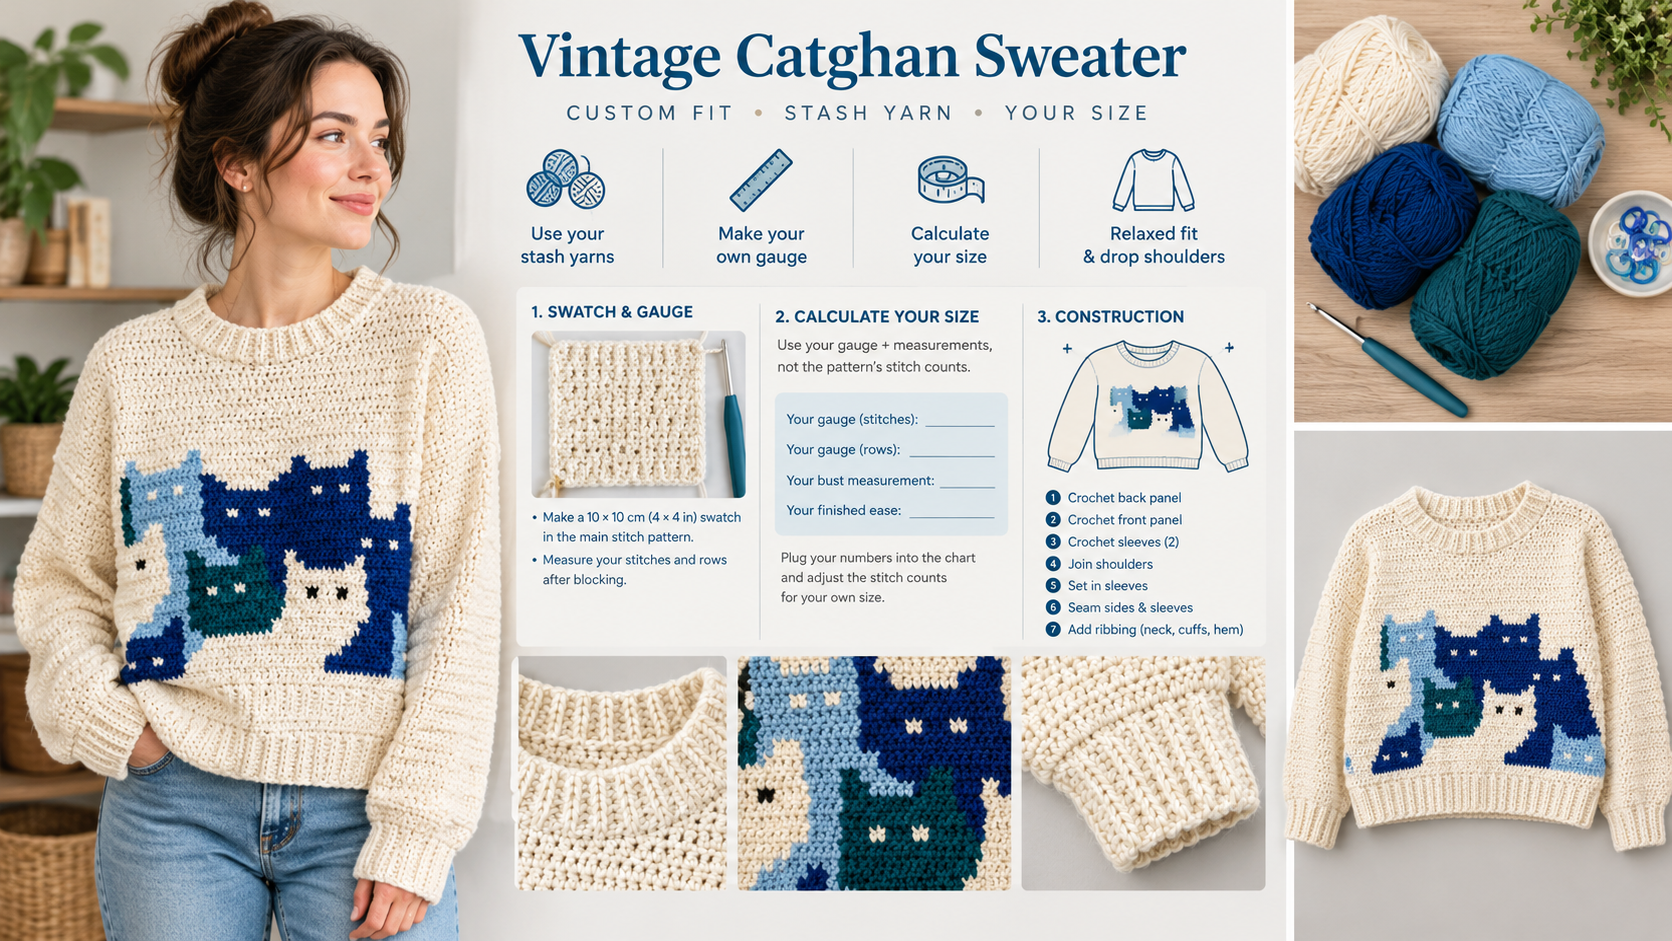
Vintage Catghan Sweater is a stash built cat motif pullover pattern for crocheters ready to work color changes, read a chart, join rounds, and assemble a garment. The relaxed drop shoulder construction uses two flat body panels and two tube shaped sleeves, so the sweater can be measured and adjusted as the pieces are made. The fixed 40 column chart and 80 stitch base panel provide a starting point, while background stitches and gauge calculations let you customize the body width.
Table of Contents
Introduction
This advanced crochet sweater project is best suited to makers comfortable with double crochet, half double crochet ribbing, colorwork, and seaming. Because verified gauge and finished dimensions are not supplied, swatching and measuring are essential before you commit to both panels.
Key Takeaways
- Make two flat body panels, two sleeves in joined rounds, then seam the sweater together.
- This is an advanced pattern that uses color changes, chart reading, joined rounds, and garment assembly.
- Customize body width, length, and sleeve dimensions with blocked gauge and the formulas in the pattern.
Pattern Overview
- Description: A colorwork pullover made from two flat body panels and two tube shaped sleeves. The front panel features a charted cat motif; the back may be made with the main color only.
- Style: Relaxed, drop shoulder pullover with ribbed cuffs, panel hems, and a ribbed neckline.
- Construction method: Work the front and back panels separately, then seam the shoulders and sides. Work sleeves from ribbed cuffs in joined rounds and sew them into the armholes.
- Skill level: Advanced. Requires color changes, chart reading, joining in rounds, and garment assembly.
- Finished measurements: The notes do not provide a verified gauge or finished dimensions, so exact measurements cannot be stated responsibly. Measure your swatch and use the formulas in Custom Adjustments to calculate your finished width and length before starting.
The supplied 40 column chart and 80 stitch panel are a fixed base, not a fully graded size range. This pattern explains how to widen the body with background stitches while keeping the cat motif centered. Check your measurements and fabric before making both panels. For more garment construction guidance, see the crochet sweater patterns collection and the crochet sweater tutorials.
Materials
- Yarn: Worsted weight or medium weight, often labeled #4, acrylic is suggested. Use white and four shades of blue from stash. The amount of each color depends on size, chart placement, and how much of the back is worked in colorwork. Weigh your swatch and finished pieces to estimate needs.
- Hook: 5 mm crochet hook, or the size needed to match your chosen gauge.
- Notions: Yarn needle, scissors, and stitch markers.
- Optional tools: Measuring tape, row counter, and a printed or digital copy of the 40 × 40 colorwork chart.
Browse crochet tools and maker essentials if you need to gather tools. The pattern does not specify yarn yardage, so estimate from a swatch and weigh pieces as you work.
Gauge and Terms
This pattern uses US crochet terminology. Gauge is not supplied, and it is essential for calculating fit. The turning chain 2 at the start of a double crochet round does not count as a stitch. Join each round with a slip stitch to the first double crochet.
Abbreviations
- BLO = back loop only
- ch = chain
- dc = double crochet
- hdc = half double crochet
- rep = repeat
- RS = right side
- sl st = slip stitch
- st(s) = stitch(es)
- WS = wrong side
Back loop only means working into the loop farther from you, leaving the other loop unworked. This creates the ridged ribbing texture.
Measure blocked gauge
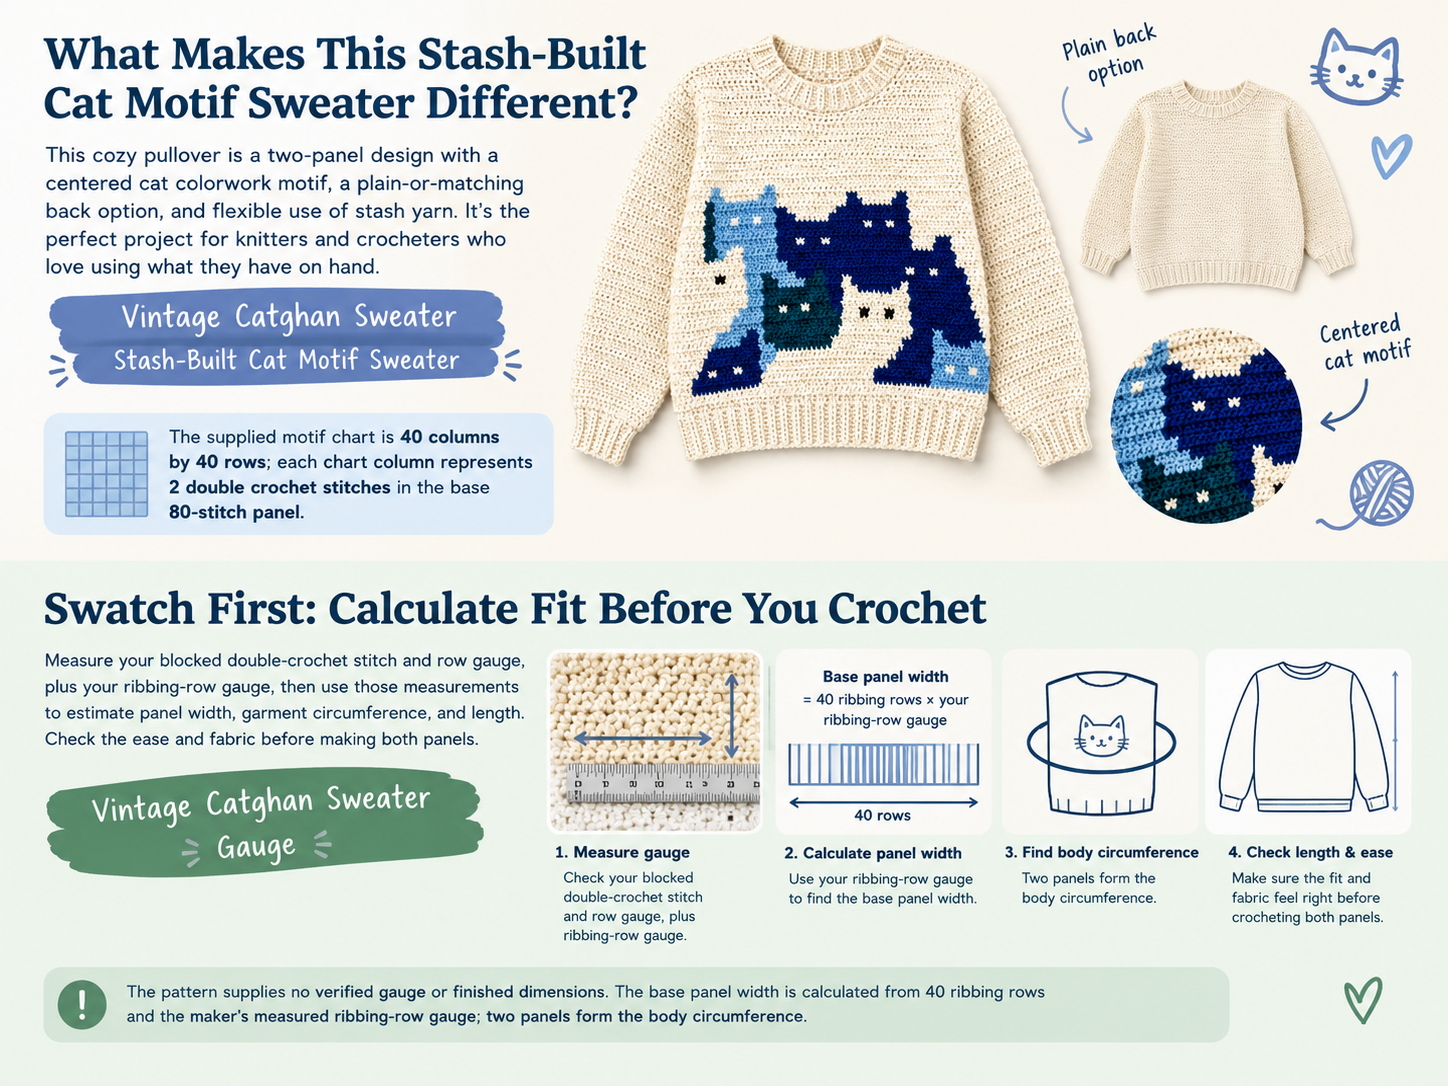
- Stitch gauge: Measure the number of double crochet stitches across a 10 cm (4 in) swatch.
- Row gauge: Measure the number of double crochet rows over 10 cm (4 in).
- How to check gauge: Crochet a swatch larger than 10 cm square in the pattern’s double crochet fabric. Wash and dry it as you plan to care for the sweater, then measure the central 10 cm (4 in). Use your blocked gauge in the formulas below. If your gauge differs from the target dimensions you need, change hook size and swatch again.
- For the ribbing, also measure how many ribbing rows fit into 10 cm (4 in) along the strip’s long edge. The strip’s row gauge determines its finished width.
Colorwork and chart notes
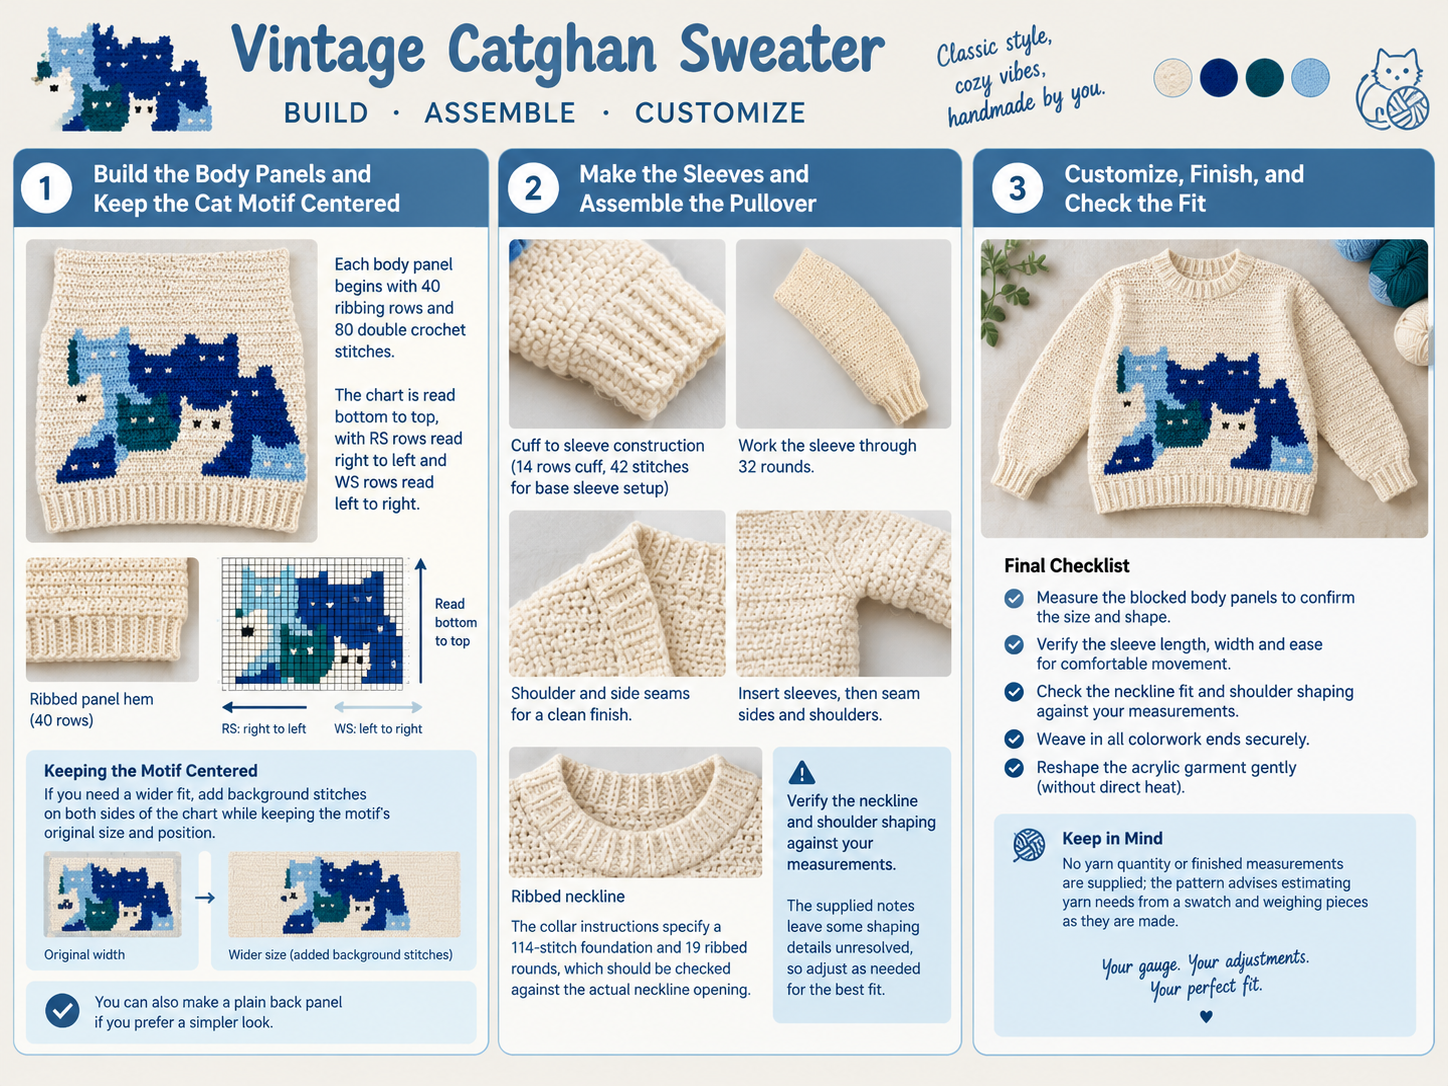
- The supplied body chart is 40 columns by 40 rows. In the base panel, each chart column represents 2 dc, so the panel has 80 dc across. Each chart row represents one crochet row.
- Read the chart from bottom to top. On RS rows, read right to left; on WS rows, read left to right.
- To change color, work the last yarn over of the final dc in the old color with the new color. Carry yarn only across short sections where it will not pull or show through; otherwise, use a separate bobbin. Keep carried yarn and tails on the WS.
- The notes specify white rows 25–34 after the final colored cat round, but do not say what to do on chart rows 35–40. Follow the supplied chart for those rows. If it has no further design, work them in white.
- The back panel may be worked entirely in the main color. For a matching graphic, work the same chart on the back.
- Try on or measure the pieces as you go. Acrylic can relax with wear and washing; use the blocked swatch and finished fabric measurements when checking fit.
Size Chart
The notes do not include a gauge, finished measurements, or yarn quantities. The table therefore gives the base construction and the measurements to calculate after swatching rather than inventing size specific numbers.
| Size | Bust/Width | Length | Sleeve Length | Yarn Required |
|---|---|---|---|---|
| Custom XS–5XL | Base: 80 dc per panel; calculate panel width from your blocked ribbing row gauge. Add background chart columns for more width. | Base: 40 chart rows, plus any shoulder/neck shaping rows; calculate from blocked row gauge. | Base: 32 dc rounds; calculate from blocked row gauge. | Not specified; estimate from a swatch and weigh pieces as you work. |
The sizes are custom measured, not pre graded. For help calculating garment ease and fit, read the crochet sweater pattern sizing guide. You can also review crochet sweater mistakes and construction checks before beginning.
Complete Crochet Pattern
Make 2 body panels. The front uses the chart; the back may be worked in the main color or charted to match. The turning chain 2 does not count as a stitch.
Body Panels
Panel ribbing
The ribbing strip forms the lower edge of the panel. Its long edge is the edge into which the body stitches are worked.
- Row 1: Ch 11. Hdc in the 2nd ch from hook and in each ch across. 10 hdc.
- Row 2: Ch 1, turn. Hdc in BLO across. 10 hdc.
- Rows 3–40: Rep Row 2. The strip has 40 rows total. For a wider or narrower panel, adjust the number of ribbing rows as described under Custom Adjustments.
Do not fasten off.
Set up the body
- Setup round/row: Ch 2. Work 2 dc into the edge of each ribbing row across. 80 dc. Turn if working flat; the setup stitches establish the bottom of the panel.
Body and colorwork
- Row 1: Ch 2, turn. Dc in each st across. 80 dc. Work chart Row 1 from bottom to top, with each chart square represented by 2 dc.
- Rows 2–24: Ch 2, turn. Dc across, following chart Rows 2–24. Keep the stitch count at 80 dc.
- Rows 25–34: Ch 2, turn. Dc across in white for 10 rows, maintaining 80 dc.
- Rows 35–40: Continue following the supplied chart, or work in white if the chart has no further colorwork. Maintain 80 dc.
Fasten off. For the back panel, either repeat the chart or work 40 rows of dc in the main color.
Neck shaping
These directions use the base panel count of 80 stitches: 25 stitches for each shoulder and 30 center stitches for the neck opening. Work the shaping at the top edge of the front panel.
- Shoulder Row 1: Join yarn at one outer edge. Ch 2, dc in the first 25 sts. 25 dc. Fasten off.
- Shoulder Rows 2–8: Join yarn at the outer edge of the same shoulder section. Ch 2, turn, dc in each of the 25 sts. 25 dc.
- Repeat Rows 1–8 on the other 25 stitch shoulder section, leaving the 30 center stitches unworked between the shoulders. Fasten off.
Important: The notes do not specify back neck shaping or precisely how the 8 shoulder rows relate to the chart’s upper edge. Before making both panels, check the intended neck opening and shoulder depth against your own measurements. If shaping the back, make its shoulder sections and neck opening match the front so the shoulder seams align.
Sleeve Panels
Make 2 sleeves. The supplied counts are a starting point; check the sleeve circumference against the wearer’s arm.
Cuff
- Row 1: Ch 11. Hdc in the 2nd ch from hook and in each ch across. 10 hdc.
- Row 2: Ch 1, turn. Hdc in BLO across. 10 hdc.
- Rows 3–14: Rep Row 2. Check the ribbing around the wrist; add or remove rows as needed.
Bring the short ends together and sl st through both layers to join into a cuff ring.
Sleeve
Turn the cuff so you can work into the ends of the ribbing rows.
- Round 1: Ch 2. Work 3 dc into the edge of each ribbing row around. Join with sl st to the first dc. 42 dc. If using more or fewer than 14 cuff rows, adjust the setup count to suit the desired sleeve fit.
- Rounds 2–32: Ch 2, dc in each st around, and join with sl st. 42 dc each round.
For a straighter looking join line, you may skip the first stitch every fourth round and work that stitch at the end of the round. If you do this, keep the total count at 42 dc and place a marker at the start of each round so the seam does not drift.
Fasten off. Leave about 90 cm (3 ft) of yarn for sewing the sleeve into the armhole if desired.
Assembly
- Block the panels: Lay them flat and shape them to the measurements you calculated from your gauge. Follow the care instructions for your yarn; do not apply direct heat to acrylic.
- Join the shoulders: Place the front and back panels with RS facing each other. Whip stitch through the outer loops of the shoulder edges, leaving the neck opening unseamed.
- Check the neckline: Confirm the front and back openings align and that the opening fits over the head. The notes specify a 114 stitch collar foundation, but do not explain how that count was calculated for the neckline. Verify the count against your actual opening.
- Make the collar: With the sweater RS facing, join yarn at the neckline. Work a foundation round of 114 dc evenly around the neck opening, adjusting the spacing as needed to avoid puckering or stretching. Join with a sl st.
- Round 1: Ch 2, hdc in BLO in each st around; join. 114 sts.
- Rounds 2–19: Ch 2, hdc in BLO in each st around; join. 114 sts each round.
The original notes do not state whether the 19 collar rows were meant to be worked in rounds or as a separate strip. This interpretation produces a ribbed collar in joined rounds; check its height and fit as you work.
- Sew in the sleeves: With the sweater laid flat, center each sleeve along the shoulder seam and pin or mark the armhole opening. Sew evenly around the opening, easing the sleeve only if necessary.
- Close the sides: Align the panel edges and sew from the cuff area toward the armhole, then close the sleeve seam from cuff to underarm. Use matching yarn where possible. Keep the seam flexible and avoid pulling it tight.
Custom Adjustments
First measure your blocked gauge. Let S = dc stitches per 10 cm (4 in), R = dc rows per 10 cm (4 in), and B = ribbing rows per 10 cm (4 in), measured along the long edge of the strip.
- Base body panel width: The base panel has 40 ribbing rows, so its approximate width is
40 ÷ B × 10 cm. - Base body circumference: Two panels make the garment circumference:
2 × panel width. This does not include extra ease. Compare it with the wearer’s bust measurement and add the amount of positive ease desired for the fit. - Base body length: The 40 dc rows measure approximately
40 ÷ R × 10 cm. Add or subtract the height of any shoulder/neck rows when calculating the finished garment length. - To increase width: For a target panel width in centimeters:
Ribbing rows needed = target panel width × B ÷ 10. Each ribbing row receives 2 dc in the setup row, soPanel stitches = ribbing rows × 2. The base 40 column chart occupies 80 dc. To preserve the chart at its original size, add an even number of plain background stitches at the sides and center the motif. Keep the total panel stitch count even so it corresponds to the ribbing rows. - To increase length: For an added length in centimeters:
Rows to add = added length × R ÷ 10. Add plain dc rows before or after the chart, as appropriate. Each added row increases length; it does not increase panel width. - To adjust sleeve circumference:
Sleeve stitches = desired sleeve circumference in cm × S ÷ 10. - To adjust sleeve length:
Sleeve rounds = desired sleeve length in cm × R ÷ 10. - Cuff fit: Change the number of ribbing rows to fit the wrist. Recalculate the sleeve setup count to suit the cuff opening and desired upper arm ease.
Use whole stitch and row counts, then check the fabric and fit. The charted motif itself is not graded; enlarging it would require a redesigned or repeated chart. For additional sweater construction and fit tutorials, see the crochet sweater tutorial.
Customization
Use the provided formulas with your blocked swatch rather than treating the base stitch counts as a standard size. The body width comes from the number of ribbing rows: 40 ÷ B × 10 cm for the base panel. To reach a target width, calculate Ribbing rows needed = target panel width × B ÷ 10, then calculate Panel stitches = ribbing rows × 2. Keep the total even and add plain background stitches at the sides to keep the chart centered.
For body length, use 40 ÷ R × 10 cm for the base 40 rows. Add rows using Rows to add = added length × R ÷ 10. Sleeve circumference and length are calculated with Sleeve stitches = desired sleeve circumference in cm × S ÷ 10 and Sleeve rounds = desired sleeve length in cm × R ÷ 10. Change the cuff ribbing row count to fit the wrist and recalculate the sleeve setup count.
For neckline adjustment, the supplied collar foundation is 114 dc evenly around the neck opening. The count is not explained by the source notes, so check the opening and adjust spacing to avoid puckering or stretching. The source also notes that the 19 collar rows may have been intended as a separate strip; the instructions here interpret them as joined rounds. Check collar height and fit as you work.
Finishing
- Weave in ends securely on the WS, especially where colors change. If yarn was carried behind the work, check that it is not tight enough to draw in the fabric.
- Lightly block the assembled sweater to your calculated measurements. For acrylic, use gentle washing and reshape while damp; avoid direct heat.
- Recheck the bust, body length, sleeve length, cuff fit, and neckline after the garment is dry. The final measurements depend on your gauge and chosen adjustments, so record them for future versions.
Troubleshooting
| Problem | Solution |
|---|---|
| The panel edges look uneven. | Count the stitches at the end of every row. Mark the first and last dc, and make sure the turning ch 2 is not being counted as a stitch. |
| The finished panels are too wide or too narrow. | Check blocked gauge and ribbing row gauge. Recalculate the number of ribbing rows and panel stitches before continuing; a different hook size may help achieve the fabric you want. |
| The sweater does not match the intended size. | Measure the blocked panels rather than relying on stitch counts alone. Compare the finished circumference with the wearer’s bust measurement plus the desired ease. Check sleeve circumference and length separately. |
| Colorwork pulls or shows carried strands. | Keep carried yarn loose, catch it only across short sections, and use separate bobbins for longer color changes. Check the WS periodically and spread the stitches along the hook after each color change. |
| The neckline collar puckers or flares. | Adjust how the 114 foundation stitches are spaced around the opening. Too many stitches can cause flaring; too few can pull the neckline in. Check the opening and collar fit before completing all 19 rounds. |
| There is not enough yarn. | Weigh the swatch and each completed piece to estimate remaining requirements. Because the notes give no yardage, buy or gather extra yarn in the main and motif colors before starting, and avoid mixing yarns with noticeably different thickness or stretch. |
Pattern Summary
- Final size range: Custom XS–5XL by measurement; the supplied 40 × 40 chart and 80 stitch body panel are the base, not pre graded sizes.
- Yarn amount: Not provided; estimate from a blocked swatch and weigh pieces as you work.
- Hook size: 5 mm, adjusted as needed to meet your measurements and fabric preference.
- Main stitch: Double crochet; ribbing uses half double crochet in the back loop only.
- Construction method: Two flat body panels, two sleeves worked in joined rounds, then seamed together.
Conclusion
This cat motif pullover combines a charted front, optional plain or charted back, ribbed details, and seamed panel construction. Its fixed chart and base counts are a foundation rather than graded sizing, so use a blocked gauge swatch to calculate body width, length, and sleeve fit before continuing. Customize the background width while keeping the motif centered, and check the neckline and collar against the actual opening. Make your swatch, gather your stash yarn, and use this Vintage Catghan Sweater pattern to plan a measured, personalized crochet sweater.
Video Tutorial
Watch the Step by Step Crochet Tutorial
Follow the video tutorial to see the construction, crochet techniques, and assembly process explained visually.
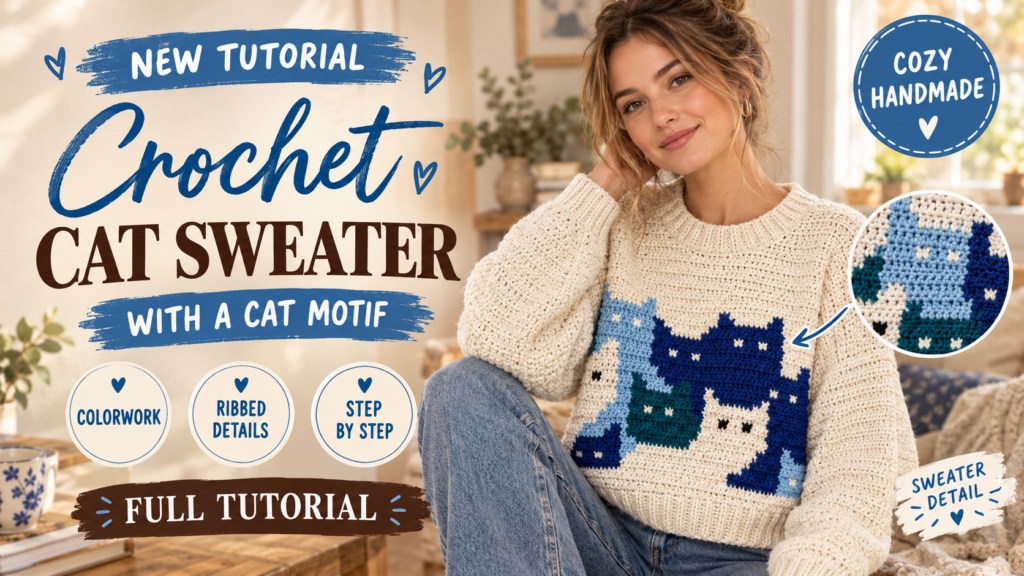
Use the play button to watch the tutorial without leaving this page.
Frequently Asked Questions
Is the Vintage Catghan Sweater suitable for beginners?
The pattern is advanced. It requires color changes, chart reading, joining in rounds, and garment assembly.
What sizes does this crochet cat sweater pattern include?
The pattern gives a custom XS–5XL range by measurement, but the supplied 40 × 40 chart and 80 stitch panel are a fixed base rather than pre graded sizes. Use the gauge formulas to customize the fit.
How much yarn do I need for the sweater?
Yarn quantities are not provided. The amount of each color depends on size, chart placement, and whether the back is worked in colorwork. Weigh your swatch and pieces to estimate needs.
Can I make the back panel plain?
Yes. The back panel may be worked entirely in the main color. For a matching graphic, work the same chart on the back.
How do I adjust the sweater width?
Measure ribbing row gauge as B, then calculate ribbing rows with target panel width × B ÷ 10. Each ribbing row receives 2 dc in the setup row, so panel stitches equal ribbing rows × 2. Add an even number of plain background stitches at the sides to preserve and center the chart.
Free Pattern Delivery
Get Your FREE Crochet Pattern PDF
Love this pattern? Enter your name and email below to get your free printable crochet pattern PDF delivered straight to your inbox!