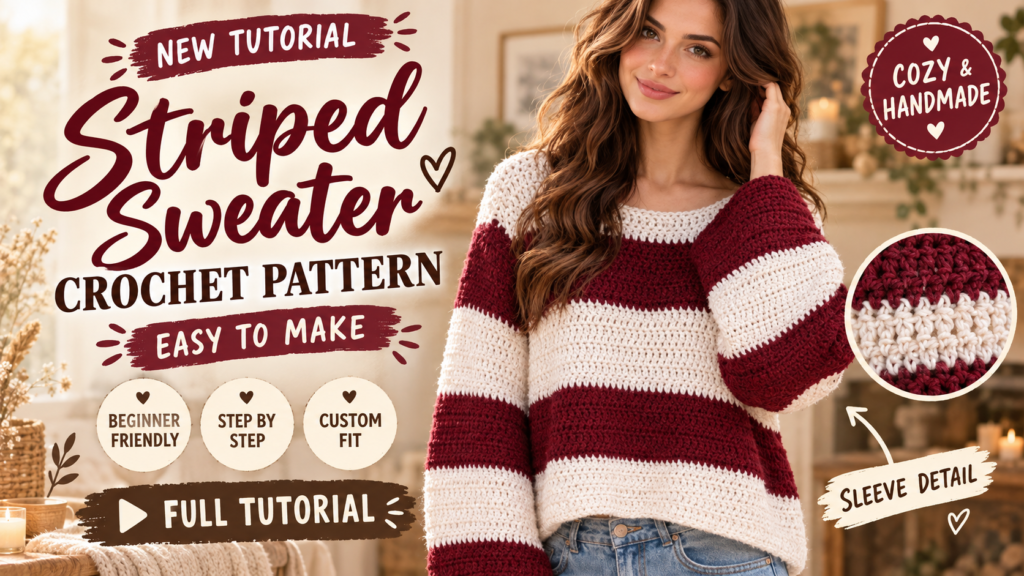
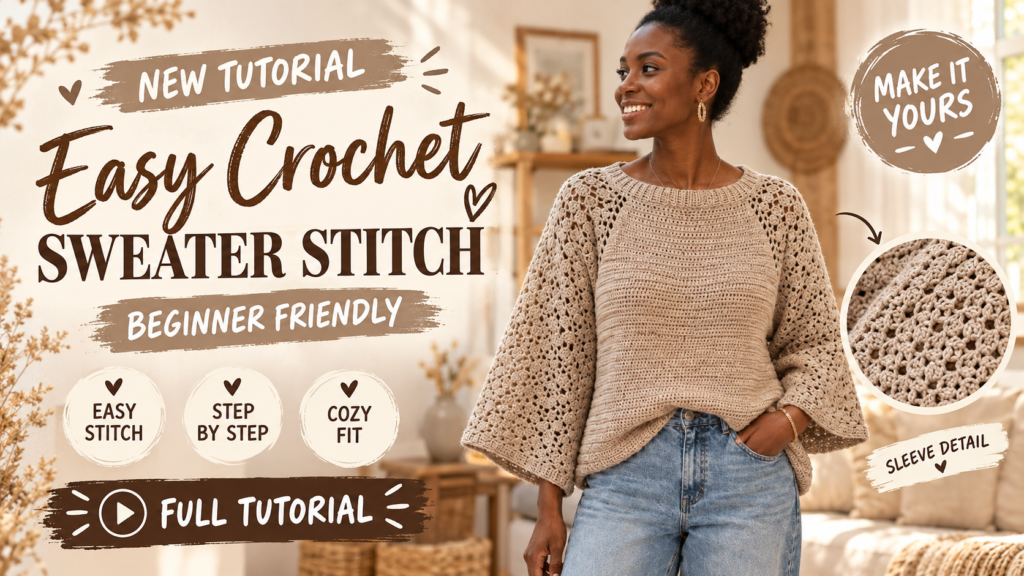
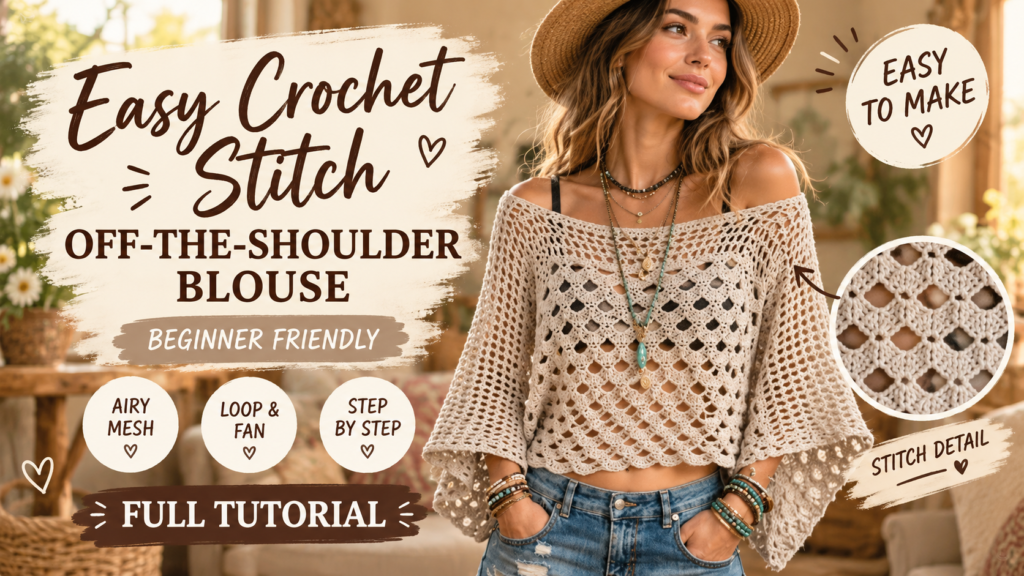
Every stitch tells a story · Free PDF Pattern with Weekly Newsletter Claim Free Guide →

Every stitch tells a story · Free PDF Pattern with Weekly Newsletter Claim Free Guide →
CROCHET SWEATER: 5 Amazing Ways to Make It Step By Step
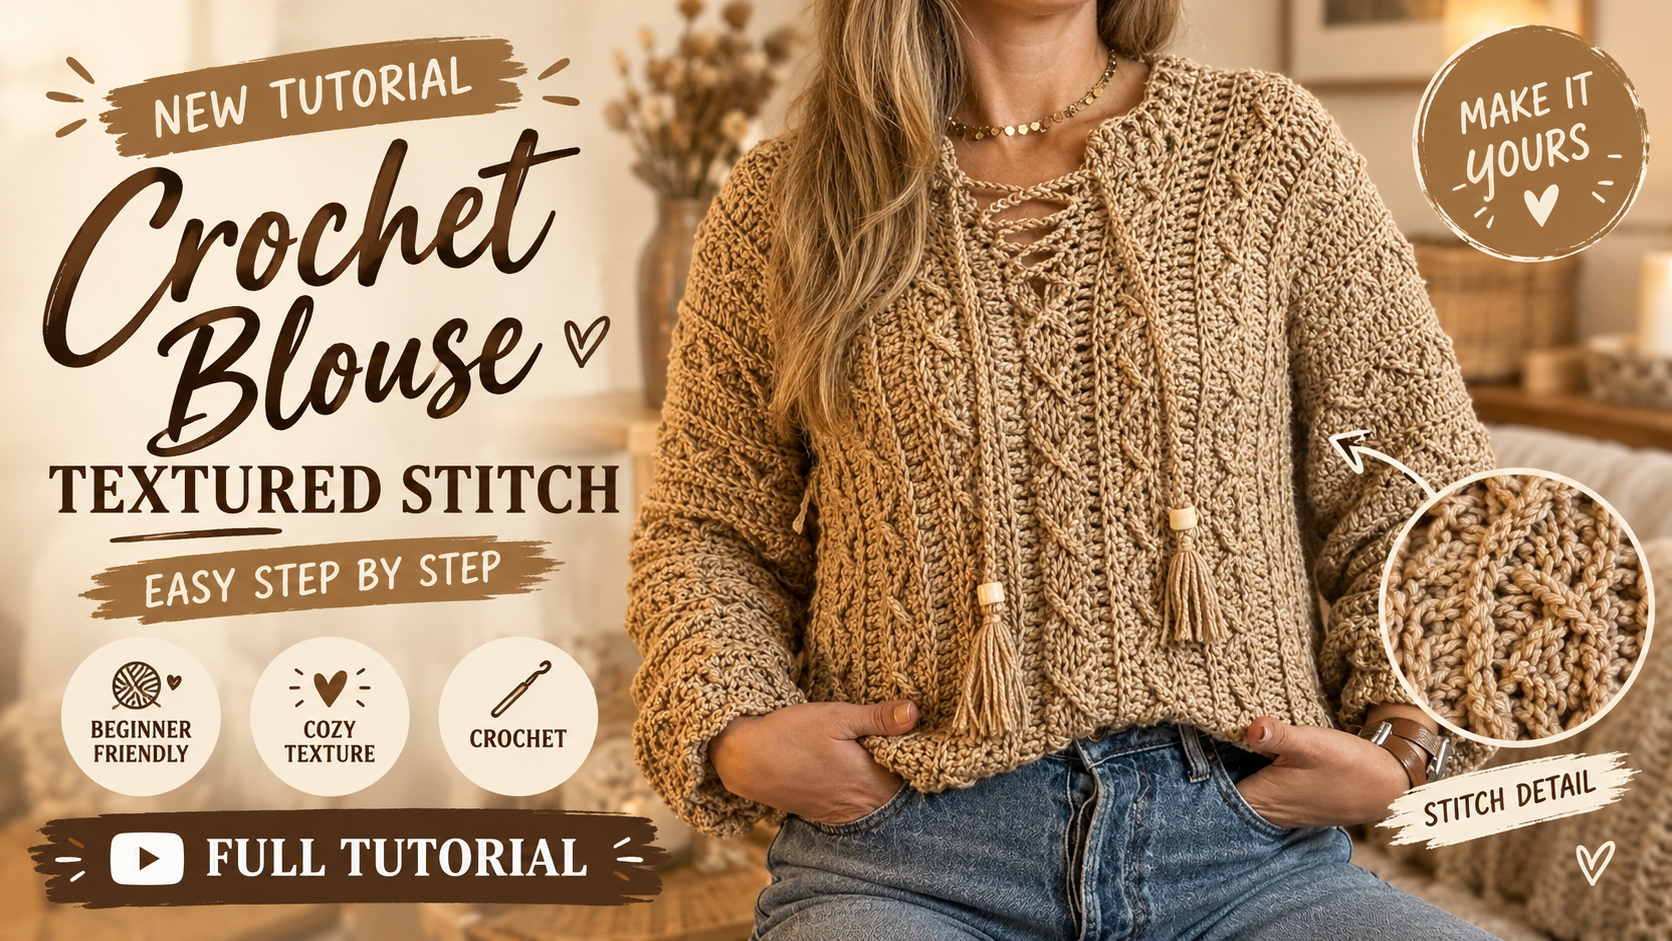
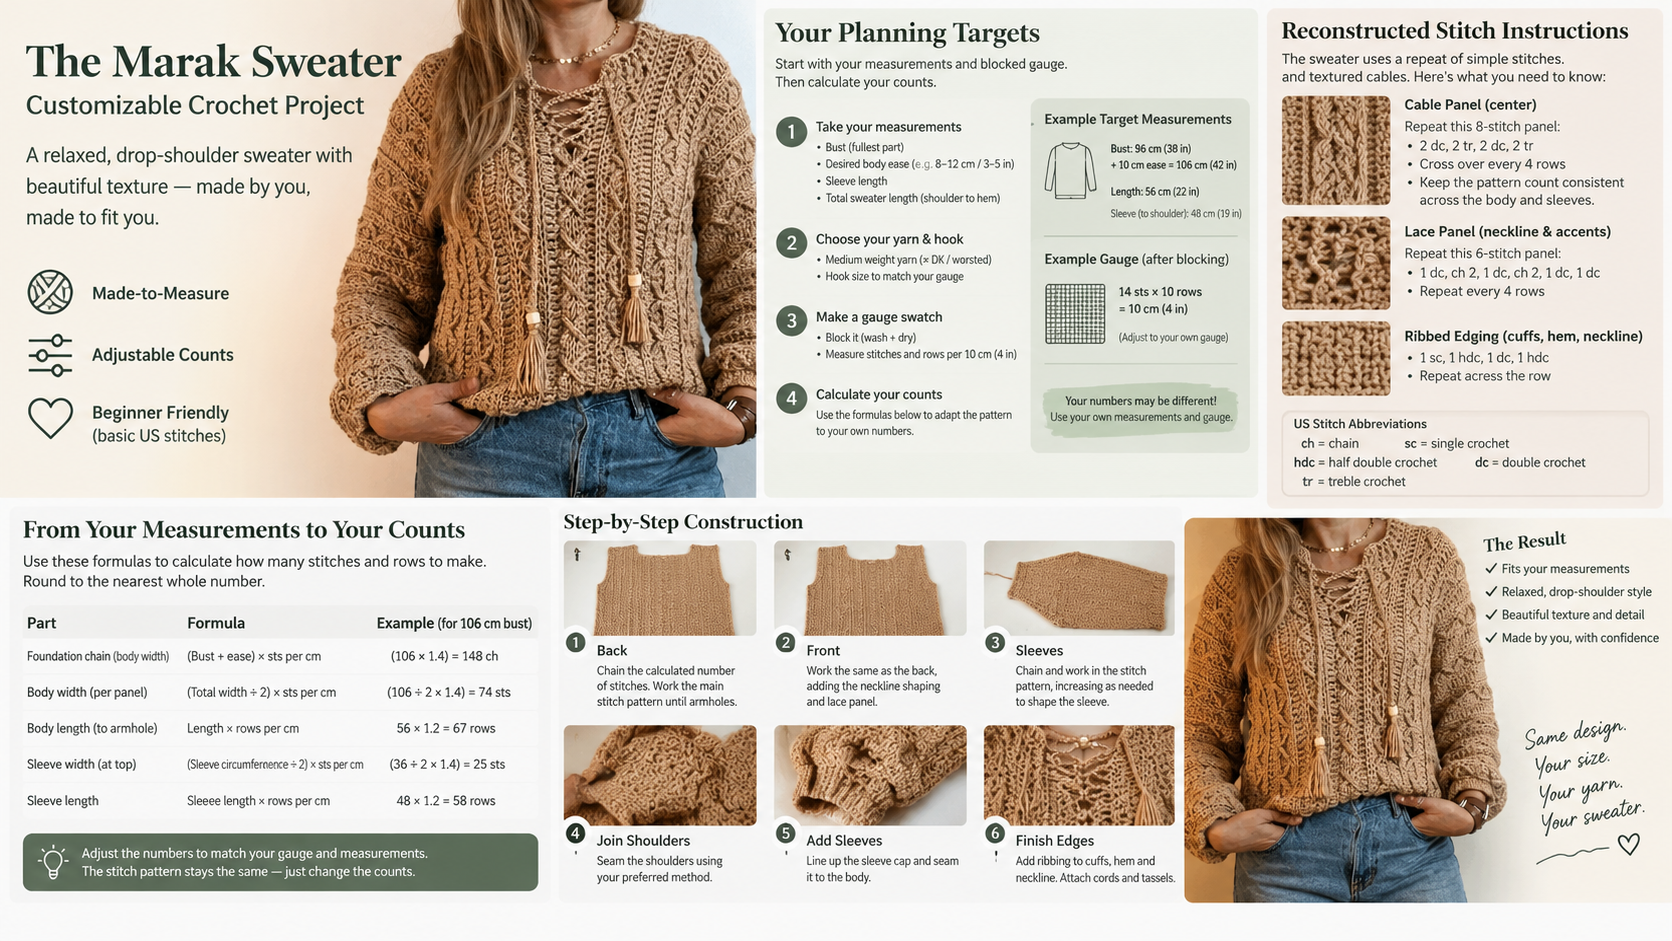
This CROCHET SWEATER pattern is a made to measure draft for a relaxed, textured pullover with a ribbed neckline and optional decorative chain, beads, and tassels. It is intended for beginners who know chain, single crochet, half double crochet, double crochet, front post double crochet, and back post double crochet. Its two rectangular body panels and two sleeve panels make the construction easy to measure, check, and customize as you work. For more sweater construction guidance, visit our crochet sweater tutorials and step by step guide to crocheting a sweater.
Table of Contents
Marak Sweater Crochet Pattern
Key Takeaways
- The pullover is made from two body panels and two sleeve panels, joined with seams.
- This is a beginner level draft, and it has not been test knit.
- Use blocked swatch measurements and wearer measurements to customize the width, length, sleeves, and fit.
Pattern Overview
- Description: A relaxed, textured pullover with a ribbed neckline and optional decorative chain, beads, and tassels.
- Style: Drop shoulder, straight sided sweater.
- Construction method: Two rectangular body panels are joined at the shoulders and sides. Two sleeve rectangles are seamed into tubes and attached to the body. This adapts the sleeve first tutorial notes into a beginner friendly construction that can be measured and checked as you work.
- Skill level: Beginner. You should know how to make chain, single crochet, half double crochet, double crochet, front post double crochet, and back post double crochet.
- Finished measurements: The chart gives drafting targets, not verified measurements. Measure the wearer and choose the desired ease before starting. For this draft, the assumed ease is approximately 20 cm (8 in) at the bust.
This is a carefully organized, made to measure draft based on the notes provided, and it has not been test knit. The notes do not specify a usable stitch gauge, reliable yarn quantities, or complete neckline counts. The draft therefore uses your blocked swatch to calculate stitch and row counts. The source notes also contain inconsistent body and neckline counts, so this version uses the simpler two panel construction rather than those incomplete counts.
Explore more crochet sweater patterns and read the crochet sweater pattern sizing guide for additional fit information.
Materials
- Yarn: Circulo Bamboo, 262 m (about 287 yd) per 200 g skein; 54% acrylic, 23% bamboo, 23% cotton. The notes do not provide enough information to confirm total sweater quantities. Estimate yours from the swatch method in the Size Chart.
- Hook: 6 mm for the main fabric and 5 mm for the collar. The source notes suggest 5 to 7 mm; use the hook size that gives you the fabric and gauge you want.
- Notions: Scissors, measuring tape, stitch markers, and yarn needle.
- Optional tools and supplies: 2.5 mm hook and 1 mm elastic for snug cuffs; beads and extra yarn for decorative chains and tassels.
For more maker essentials, browse our crochet tools and supplies.
Gauge and Terms
No measured gauge was supplied, so there is no verified stitch or row gauge to publish. Gauge means the number of stitches and rows in a measured area of crochet. US crochet terms are used.
Gauge Swatch
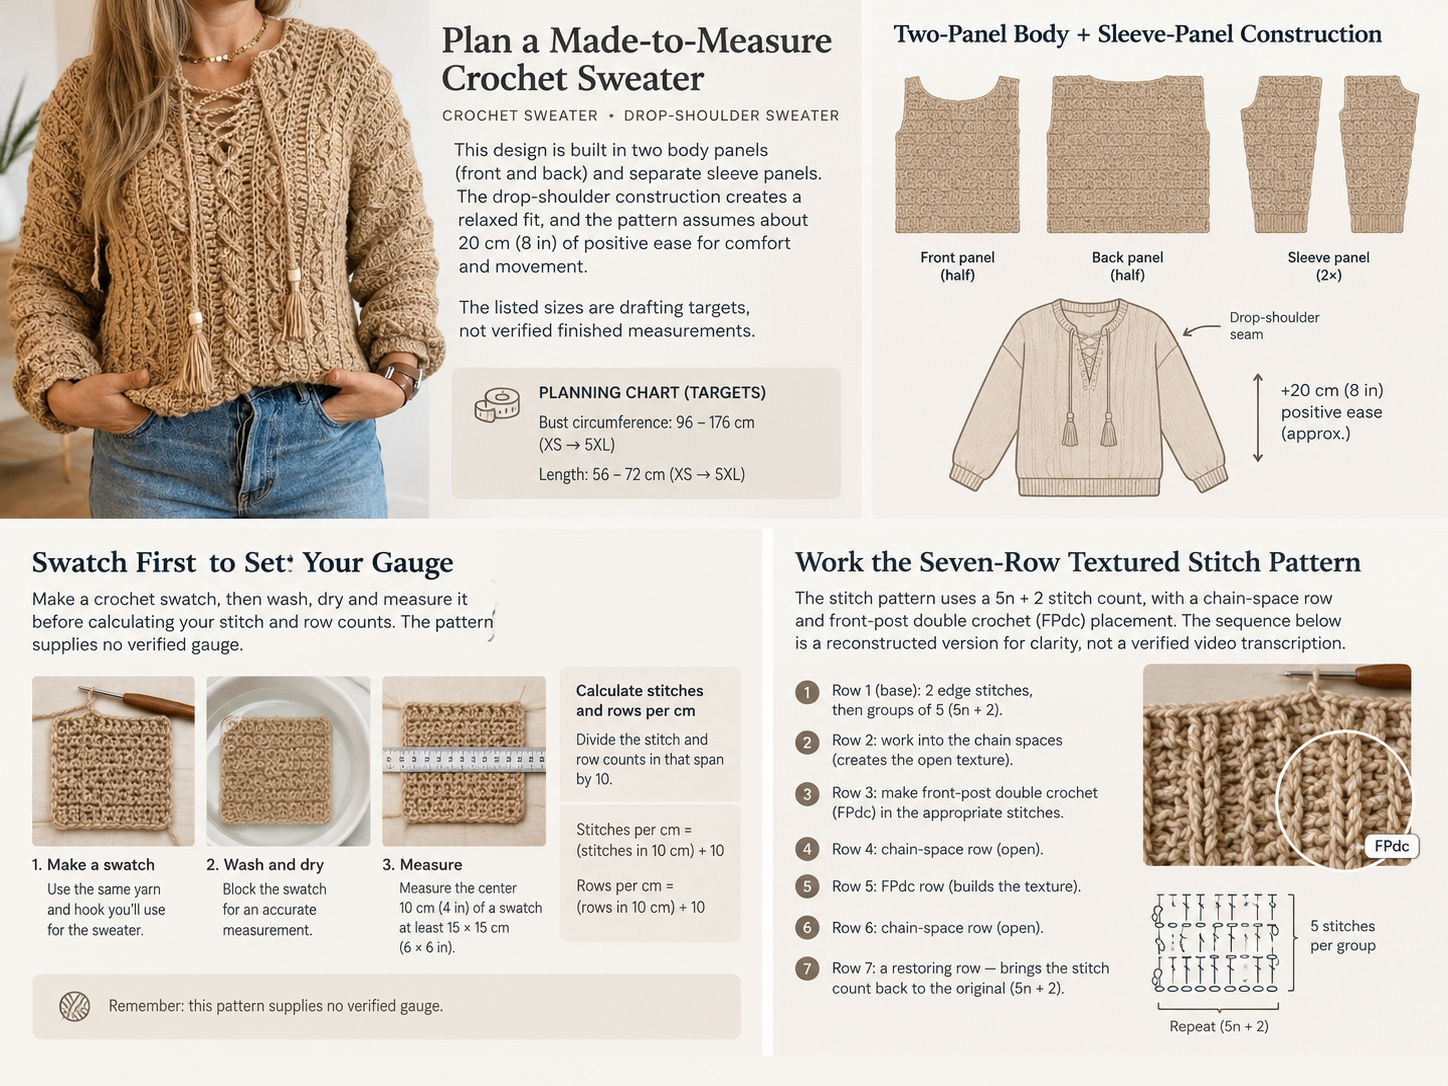
- With the 6 mm hook, make a swatch at least 15 × 15 cm (6 × 6 in) using the seven row texture sequence below.
- Wash and dry the swatch as you intend to care for the sweater. Let it rest flat.
- Measure across the center 10 cm (4 in), avoiding the edges. Record the number of stitches and rows in that span.
- Stitch gauge (S): stitches in 10 cm ÷ 10 = stitches per cm.
- Row gauge (R): rows in 10 cm ÷ 10 = rows per cm.
- Use your blocked gauge in the formulas below. If your swatch is too wide or too narrow, change hook size and make another swatch before beginning the sweater.
The fabric’s height can change after washing, so do not rely on unblocked row measurements.
Abbreviations
- BLO: back loop only
- ch: chain
- dc: double crochet
- FPdc: front post double crochet
- BPdc: back post double crochet
- hdc: half double crochet
- rep: repeat
- RS: right side, the outside of the garment
- sc: single crochet
- sk: skip
- sl st: slip stitch
- st(s): stitch(es)
- WS: wrong side, the inside of the garment
Post stitch placement: For FPdc or BPdc, work around the upright body of the indicated stitch, not into its top loops. FPdc brings the stitch forward; BPdc pushes it behind the fabric.
Notes before starting: The original notes describe a stitch multiple of 5 + 2. For this draft, use a stitch count of 5n + 2: 2 edge stitches plus groups of 5. For example, 42 stitches = 5 × 8 + 2. The seven row sequence is an editorial reconstruction from the notes. It preserves the described combination of dc, hdc, chain spaces, sc, and raised stitches, but it should not be treated as a verified transcription of the video. Turning chains do not count as stitches unless stated otherwise. Place a marker in the first and last actual stitch of each row. Bamboo and cotton blends may drape and grow after washing. Wash and dry your swatch before calculating the sweater, and avoid stretching the fabric while seaming. Before cutting yarn for a custom size, write down the wearer’s measurements, desired ease, gauge, and calculated stitch and row counts.
Size Chart
The following are planning targets for an adult drop shoulder sweater, based on the explicit assumption of about 20 cm (8 in) positive ease. They are not measurements supplied in the original notes. Adjust to the wearer; a loose sweater may need more ease, and a closer fit less. For more help adapting a pattern, see our guide to crochet sweater pattern fit.
| Size | Bust/Width | Length | Sleeve Length | Yarn Required |
|---|---|---|---|---|
| XS | 96 cm / 38 in | 56 cm / 22 in | 44 cm / 17¼ in | Calculate from swatch; see below |
| S | 106 cm / 41¾ in | 58 cm / 22¾ in | 45 cm / 17¾ in | Calculate from swatch; see below |
| M | 116 cm / 45¾ in | 60 cm / 23½ in | 46 cm / 18 in | Calculate from swatch; see below |
| L | 126 cm / 49½ in | 62 cm / 24½ in | 47 cm / 18½ in | Calculate from swatch; see below |
| XL | 136 cm / 53½ in | 64 cm / 25¼ in | 48 cm / 19 in | Calculate from swatch; see below |
| 2XL | 146 cm / 57½ in | 66 cm / 26 in | 49 cm / 19¼ in | Calculate from swatch; see below |
| 3XL | 156 cm / 61½ in | 68 cm / 26¾ in | 50 cm / 19¾ in | Calculate from swatch; see below |
| 4XL | 166 cm / 65¼ in | 70 cm / 27½ in | 51 cm / 20 in | Calculate from swatch; see below |
| 5XL | 176 cm / 69¼ in | 72 cm / 28¼ in | 52 cm / 20½ in | Calculate from swatch; see below |
Calculate Your Panel and Yarn Requirements
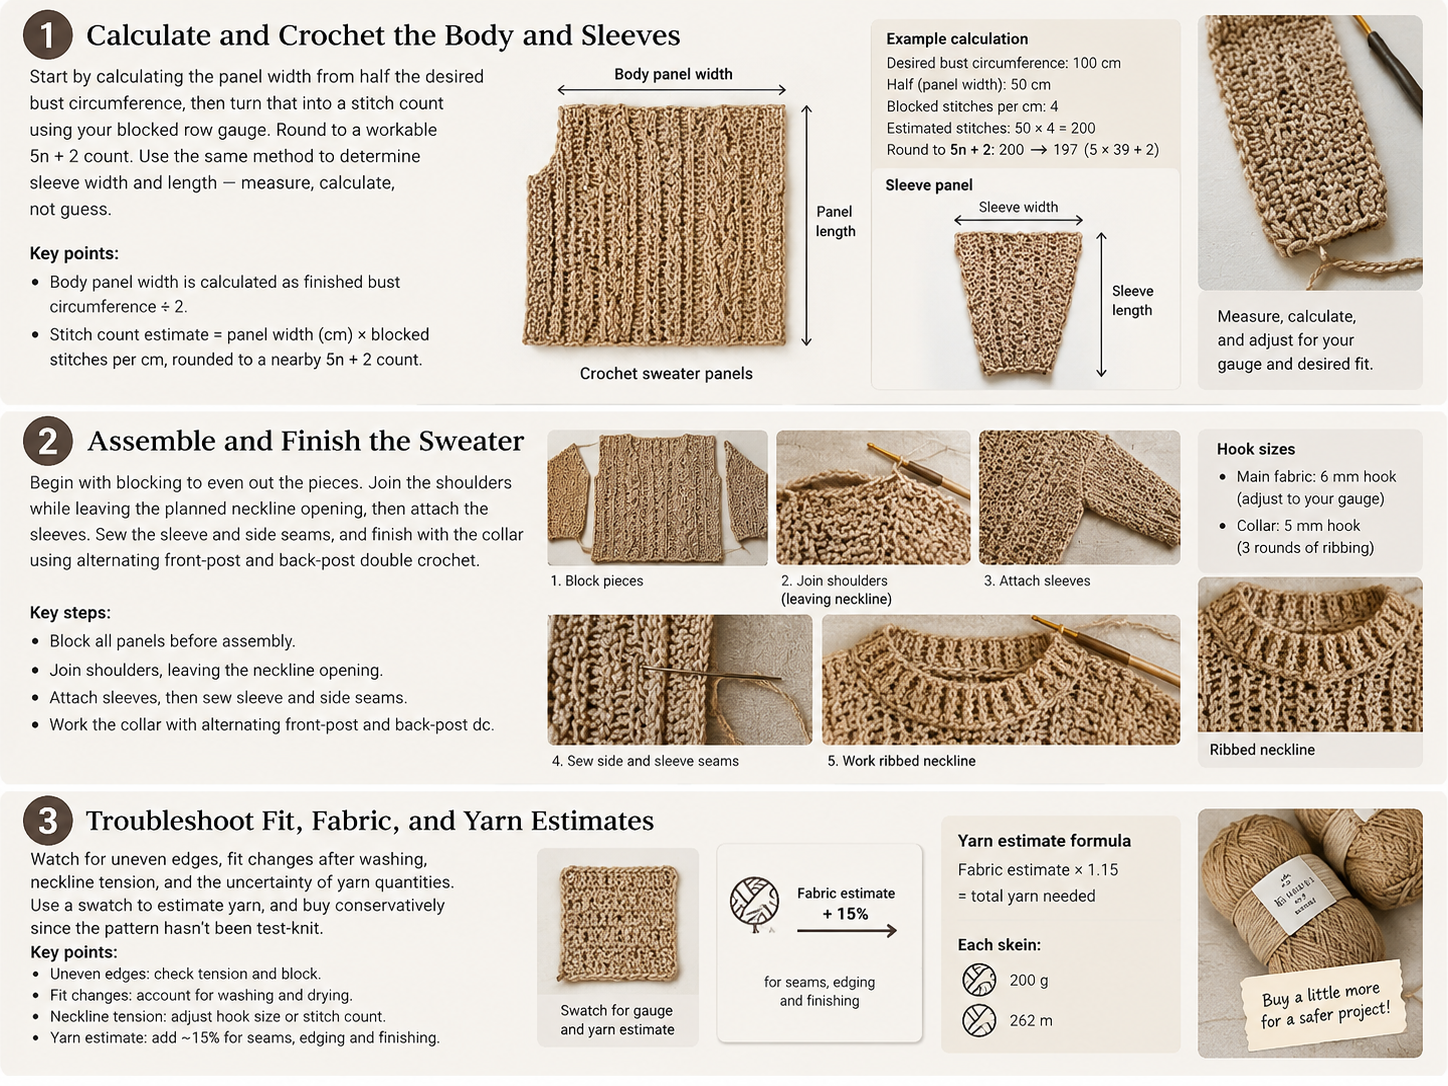
- Calculate panel width: Finished bust circumference ÷ 2 = width of one body panel.
- Calculate the stitch count: Panel width in cm × your blocked stitch gauge (S) = estimated stitches. Round to a nearby count of 5n + 2. Recalculate the actual width using the rounded count ÷ S. If needed, choose the next multiple that produces a better fit.
- Calculate panel rows: Desired panel length in cm × your blocked row gauge (R) = estimated rows. Adjust to finish after Row 7 of the stitch sequence.
- Estimate yarn: Weigh the finished, blocked swatch and calculate its area. Then estimate yarn use as:
swatch weight ÷ swatch area × estimated garment fabric area × 1.15. The 1.15 adds approximately 15% for seams, edging, and finishing. This is an estimate; yarn use varies with gauge, stitch height, and individual tension. Divide the estimated grams by 200 for the number of skeins, and round up. Each skein is 262 m.
Complete Crochet Pattern
The pattern is worked in two body panels and two sleeve panels. Each panel is worked flat, turning at the end of every row. The main stitch count uses 5n + 2. The sample count of 42 stitches in the notes is one possible count; it is not a graded size.
Body Panels
Make two matching panels, unless you want a different front and back neckline. Calculate the panel width from the Size Chart, then select a stitch count of 5n + 2.
- Foundation row: Ch the calculated number of stitches.
- Row 1: Dc in the 2nd ch from the hook and in each remaining ch. Count your stitches. The number of dc should equal the number of chains worked into. Turn.
- Row 2: Ch 1 (does not count as a st), hdc in each st across. Turn.
- Row 3, chain space row: Ch 1, sc in the first 2 sts; *ch 1, sk the next st, sc in the next 4 sts; rep from * across. Turn.
- Count check: This row uses the full 5n + 2 stitch count. It should finish with a group of 4 sc. Each ch 1 space replaces one skipped stitch; it does not add a stitch to the base row.
- Row 4: Ch 1, sc in each sc and once in each ch 1 space across. Turn. Your stitch count returns to the original count.
- Row 5, raised texture row: Ch 1, sc in the first 2 sts; *FPdc around the next st (the sc worked into a ch 1 space on Row 4), sc in the next 4 sts; rep from * across. Turn.
- Row 6: Ch 1, sc in each st across. Turn.
- Row 7: Ch 2 (does not count as a st), dc in each st across. Turn.
- Repeat: Repeat Rows 2 to 7 until the panel reaches the desired length, measured from its foundation edge. Finish after Row 7. Use the same number of rows for both panels unless deliberately shaping the neckline differently.
The notes mention six motifs producing an example sleeve around 40 cm long and 35 cm wide when laid flat. That is a single example, not a size rule. Your blocked gauge and motif dimensions determine how many repeats you need.
Neckline Shaping
The original notes do not provide consistent counts or complete shaping instructions. For a simple beginner neckline, leave the top of the panels unsewn at the center during assembly, then work the collar around the opening. To create a deeper front opening, leave a longer center section of the front shoulder edge unsewn than at the back. Pin the shoulders and try the opening on before sewing; record the opening width so it stays centered.
Sleeve Panels
Make two matching sleeve panels. This draft does not provide a tested sleeve stitch count or cuff measurement, so calculate them from the wearer and your swatch.
- Measure from the shoulder seam to the desired cuff. This is the sleeve length.
- Measure the wearer’s upper arm and add the desired ease. This is the sleeve’s circumference at the widest point.
- Calculate the sleeve panel’s starting width as:
upper arm circumference with ease ÷ 2. - Multiply that width by your stitch gauge. Round the result to a count of 5n + 2, then check the resulting measurement.
- Chain that number of stitches and work Rows 1 to 7 of the Main Body stitch sequence.
- Repeat Rows 2 to 7 until the sleeve panel reaches the measured sleeve length. Finish after Row 7.
- Make the second sleeve panel to the same measurements. Block both panels to the same size.
To taper a sleeve, reduce the stitch count evenly near the cuff in small increments, keeping the new stitch count at a workable five plus two count. The provided notes do not specify taper shaping; check the fit before making matching reductions on the second sleeve.
Assembly
- Block first: Wet or steam block the pieces using the yarn label’s care guidance. Pin to the measurements you calculated and allow them to dry fully.
- Join shoulders: Place front and back panels RS together. Use a yarn needle and matching yarn to sew the shoulder edges, leaving the planned neckline opening unsewn. Use the same seam length on both shoulders.
- Attach sleeves: Lay the body flat with the shoulder seams centered. Mark the same length along each side of each shoulder seam for the sleeve opening. Center each sleeve panel on that opening and sew it in place.
- Sew sleeves and sides: Fold the sweater with RS together. Sew each sleeve seam from cuff to underarm, then continue down the body side seam. Match the two sides carefully. Leave side slits open only if desired, and make them the same length on both sides.
- Neckline finishing: With the 5 mm hook, join yarn at the neckline edge. Ch 2, then work dc evenly around the opening. Place extra stitches at corners if the fabric pulls; if the edge ruffles, use fewer stitches. Join with a sl st. Work three rounds of ribbing: ch 2, then alternate FPdc and BPdc around. At the end of each round, join with a sl st and begin the next round with the opposite post stitch so the ribs alternate. Adjust the stitch placement if necessary to keep the collar flat.
- Lower edge: If desired, work one round of hdc evenly around the lower edge. Do not force a set number of stitches along row ends; distribute them evenly and check that the edge lies flat.
- Optional decoration: Thread a long chain through the sweater in a zigzag path. Add beads only if they are securely attached and appropriate for the intended wearer. Tassels can be made by wrapping yarn around a hand or card approximately 20 times, tying one end securely, cutting the other, and attaching them firmly.
Custom Adjustments
Use the formulas below with your measured gauge and the wearer’s measurements. Recheck the resulting dimensions after rounding stitch counts to a workable 5n + 2 count.
- To increase width: Add approximately
desired width increase in cm × stitch gauge (S)stitches to each affected panel. Round the result to a nearby count of 5n + 2. Recheck the panel width after rounding. - To increase length: Add approximately
desired length increase in cm × row gauge (R)rows. Add or remove whole seven row motifs where possible, and finish after Row 7. - To adjust sleeves: For a wider upper arm, add approximately
desired circumference increase ÷ 2 × Sstitches to each sleeve panel, rounding to a count of 5n + 2. To change sleeve length, add or remove rows usinglength change × R, preferably in complete motifs. - To adjust fit: Compare the finished bust circumference with the wearer’s bust measurement. The difference is the ease. Increase panel width if the sweater needs more ease; decrease it if it needs less.
- To adjust the neckline: Leave the top of the panels unsewn at the center during assembly, then work the collar around the opening. For a deeper front opening, leave a longer center section of the front shoulder edge unsewn than at the back. Pin the shoulders and try the opening on before sewing, and record the opening width so it stays centered.
Customization
Customize this made to measure pattern using only your blocked gauge and the adjustment formulas. For width, use desired width increase in cm × stitch gauge (S) stitches per affected panel and round to a nearby count of 5n + 2. For length, use desired length increase in cm × row gauge (R) rows, adding or removing whole seven row motifs where possible and finishing after Row 7.
For sleeves, use desired circumference increase ÷ 2 × S stitches for a wider upper arm and length change × R rows for a sleeve length change. For neckline adjustment, leave the center of the panel tops unsewn while assembling. A deeper front opening uses a longer unsewn center section at the front shoulder edge than at the back. Pin and try the opening before sewing, and record its width so it stays centered.
Finishing
- Weave in all yarn ends securely with a yarn needle, working them through several stitches on the WS.
- Check that the shoulder seams, sleeve seams, and side seams are even and secure.
- Wet block or steam block according to the yarn label. Do not hang the sweater to dry; the bamboo and cotton content may allow the fabric to lengthen under its own weight.
- After blocking, measure the sweater flat and compare it with your planned finished measurements. Record the final bust circumference, body length, and sleeve length. If the fabric has grown, reshape it while damp and dry flat.
Wash and dry the swatch as you intend to care for the finished sweater, and use the yarn label’s care guidance when blocking the pieces. The bamboo and cotton content may allow the fabric to lengthen, so avoid hanging the sweater to dry.
Troubleshooting
| Problem | Solution |
|---|---|
| The panel edges are uneven. | Count stitches at the end of every row, mark the first and last stitch, and make sure the turning chain is not accidentally counted as a stitch. |
| The fabric is much wider or narrower than expected. | Recheck the blocked swatch gauge. Change hook size and reswatch, or recalculate the stitch count using your measured gauge. |
| The chain space row does not end evenly. | Check that the starting count is 5n + 2. On Row 3, work 2 sc, then repeat *ch 1, skip 1, sc in 4* across. Check each repeat as you go. |
| The neckline collar ruffles or pulls. | Ruffling usually means too many stitches were added; pulling usually means too few. Undo the round and adjust the number of stitches, especially at corners. |
| The sweater is too short or the sleeves are too short. | Add complete six row repeats of Rows 2 to 7 where possible. Recalculate the additional rows from your row gauge before continuing. |
| You are running short of yarn. | Compare the remaining yarn with the amount needed for both sleeves and finishing before starting them. The notes do not establish a tested skein count; the swatch based estimate is approximate, so buying an extra skein from the same dye lot is prudent. |
Pattern Summary
- Final size range: XS to 5XL planning targets; customize using wearer measurements and blocked gauge.
- Yarn amount: Not specified in the source notes. Estimate from your blocked swatch and garment area; round up to whole 200 g skeins.
- Hook size: 6 mm main hook; 5 mm collar hook. Adjust to meet your chosen gauge.
- Main stitch: Reconstructed seven row texture sequence using dc, hdc, sc, chain spaces, and FPdc.
- Construction method: Two body panels and two sleeve panels, seamed into a drop shoulder sweater.
For related garment inspiration, see our crochet fashion ideas and crochet sweater for beginners guide.
Conclusion
The Marak Sweater is a beginner friendly, made to measure pullover draft worked from two body panels and two sleeve panels. Its blocked swatch method lets you calculate stitch and row counts for the wearer rather than relying on an unverified gauge or yarn quantity. Customize panel width, body length, sleeve measurements, fit, and neckline opening using the supplied measurements and formulas. Make your swatch, record your calculations, and follow the steps to create your own CROCHET SWEATER. For additional project ideas, explore the crochet sweater pattern collection.
Watch the Step by Step Crochet Tutorial
Watch the Step by Step Crochet Tutorial
Follow the video tutorial to see the construction, crochet techniques, and assembly process explained visually.
Watch the complete crochet tutorial below and follow along with the written pattern.
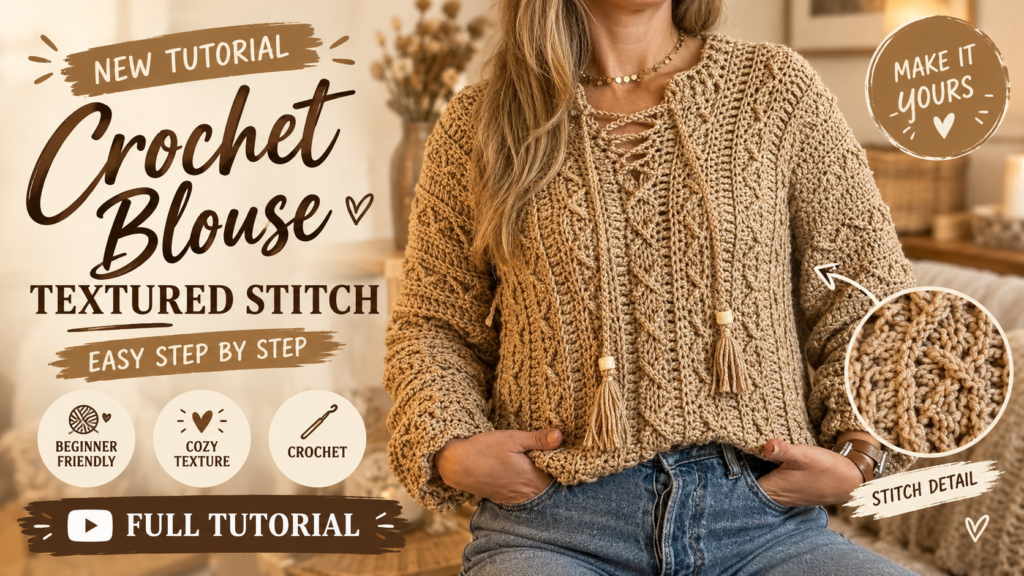
Use the play button to watch the tutorial without leaving this page. The supplied video is also available as an external crochet tutorial reference.
Frequently Asked Questions
Is this Marak Sweater pattern beginner friendly?
Yes. It is marked beginner level for crocheters who know chain, single crochet, half double crochet, double crochet, front post double crochet, and back post double crochet.
Has the Marak Sweater pattern been test knit?
No. It is a carefully organized, made to measure draft based on the supplied notes and has not been test knit. Gauge, yarn quantities, and complete neckline counts were not established in the notes.
How do I choose a size for this crochet sweater?
The size chart gives planning targets based on an assumed 20 cm (8 in) positive ease at the bust. Measure the wearer, choose the desired ease, and use the blocked swatch gauge to calculate panel stitch and row counts.
How much yarn does the pattern require?
A reliable total yarn quantity is not specified. Estimate yarn use from the weight and area of your blocked swatch, the estimated garment fabric area, and the supplied 1.15 allowance, then divide estimated grams by 200 and round up to whole skeins.
Can I change the neckline or sleeve length?
Yes. To create a deeper front opening, leave a longer center section of the front shoulder edge unsewn than at the back. Change sleeve length using your row gauge and the supplied length adjustment formula, preferably in complete motifs.
Free Pattern Delivery
Get Your FREE Crochet Pattern PDF
Love this pattern? Enter your name and email below to get your free printable crochet pattern PDF delivered straight to your inbox!